Design of a FSAE cooling system
24
0
0
Texte intégral
Figure

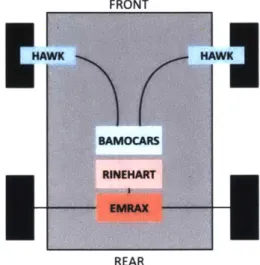

![Table 1: Flowrate, water temperature and pressure limit requirements of the Rinehart, Emrax, Bamocar and Hawk 40 motors as specified by their respective manufacturers [1],[2],[3],[4]](https://thumb-eu.123doks.com/thumbv2/123doknet/14684287.559904/9.917.77.795.289.416/flowrate-temperature-pressure-requirements-rinehart-specified-respective-manufacturers.webp)
+7


Documents relatifs
