Design and Manufacture of a CNC Desktop Lathe for Use in a Project-Based Class by Jonathan C. Hsieh MASSACHUSETTS INSTITUTE OF TECHNOLOGY
AUG 14
2008
LIBRARIES
SUBMITTED TO THE DEPARTMENT OF MECHANICAL ENGINEERING IN PARTIAL FULFILLMENT OF THE REQUIREMENTS FOR THE DEGREE OF
BACHELOR OF SCIENCE IN MECHANICAL ENGINEERING AT THE
MASSACHUSETTS INSTITUTE OF TECHNOLOGY
JUNE 2008
@ 2007 Massachusetts Institute of Technology
All rights reserved.
Signature of~~~~~~~~uthor... ... .. . . . .. . ..--
- - ---
---Signature of Author...Dep ofMechanical Engineering
May 9, 2008
Certified by.... ... ...
Martin L. Culpepper Associate Professor of Mechanical Engineering
Thesis Supervisor
Accepted by... . ... Lienhard
John Lienhard V Professor of Mechanical Engineering Chairman, Undergraduate Thesis Committee
Design and Manufacture of a CNC Desktop Lathe for Use in a Project-Based Class
by
Jonathan C. Hsieh
Submitted to the Department of Mechanical Engineering on May 9, 2008 in Partial Fulfillment of the Requirements for the Degree of Bachelor of Science in
Mechanical Engineering
ABSTRACT
The objective of this project is to evolve the design of a CNC desktop lathe for use in a project-based class and then fabricate a prototype to confirm the functionality of the design. This iteration of the lathe effectively reduces the cost, size, weight, and complexity of the machine to make the lathe more accessible and robust for use in as a learning tool. Elements from previous lathes are integrated into the new design along with other improvements. The original 14"x20" footprint is reduced to 9.5"x15" by reconfiguring the actuators and integrating the spindle motor into the headstock. Redesigning the lead screw bearing configuration reduces the part count and complexity. Hard stops are added to the lead screw flexure to make it easier to handle during assembly. A bellow chip cover is added to keep the lathe cleaner during use.
Thesis Supervisor: Martin L. Culpepper
Acknowledgements
I would like to thank all of my family and friends for their love and support throughout my academic career.
Table of Contents
ABSTRACT ... 3
Table of Contents... ... 7
List of Figures... ... 9...
1 Introduction... ... 11
1.1 The Desktop Lathe for Use in a Project-Based Class...11
1.2 Previous Iterations of the Desktop Lathe...12
1.2.1 Elements of Mechanical Design, Spring 2007... 12
1.2.2 Precision M achine Design, Fall 2007... . ... ... 13
1.3 Importance... ... 14
2 The Initial Redesign Process... ... 15
2.1 Analysis of Previous Designs...15
2.2 Redesigned Assemblies and Parts... ... 16
2.2.1 Actuator Configuration... ... 16
2.2.2 Lead Screw Bearing Configuration... ... ... 18
2.2.3 Lead Screw Flexure... ... 19
2.2.4 Cross Feed Carriage... ... 20
2.2.5 Three-Jaw Chuck... ... 21
2.2.6 Chip M anagem ent... ... 21
3 The Prototype... ... 24
3.1 Prototype Fabrication... ... 24
3.1.1 Fabricated Parts... ... 24
3.1.2 M odifications to Recycled Parts... ... 25
3.2 Prototype Testing... ... 26
3.3 Alterations in Fabrication for Higher Volum es... ... 26
4 Conclusion... ... 28
4.1 Sum m ary of Changes... ... 28
4.2 Future Iterations... ... 29
List of Figures
Figure 1.1: A typical metalworking lathe ... 11
Figure 1.2: An example of a Elements of Mechanical Design desktop lathe, Spring 2007... 13
Figure 1.3: The CNC desktop lathe from Precision Machine Design, Fall 2007... 13
Figure 2.1: Areas of focus for redesign: the actuator, lead screw, and carriage configurations... 15
Figure 2.2: The main actuator is mounted directly onto the headstock... .... 17
Figure 2.3: The lead screw actuator orientation is flipped to decrease size and to centralize the ends of all three actuators... ... 18
Figure 2.4: The lead screw bearing setup...18
Figure 2.5: The lead screw flexure with hard stops... ... 20
Figure 2.6: The nylon cross feed carriage and flexure...21
Figure 2.7: An increased height on the headstock and tool holder make room for the chuck...21
Figure 3.1: Parts cut from 1" 6061 Aluminum... 24
Figure 3.2: Parts cut from 1/4" 6061 Aluminum... ... ... 25
Figure 3.3: M odified recycled parts...26
Figure 4.1: The redesigned CNC desktop lathe... ... 28
Figure A l: C enter Tube...32
Figure A 2: Carriage Base...32
Figure A 3: Cross Feed Brace...33
Figure A 4: Cross Feed Flexure...33
Figure A 5: Tailstock...35
Figure A6: Headstock...35
Figure A 7: Lead Screw Flexure...35
Figure A8: Spindle A ctuator M ount... ... 36
Figure A9: Spindle Actuator Mount Side...36
1 Introduction
Two semesters ago, groups of students designed and fabricated parts of a desktop lathe for a project-based, mechanical design class. The next semester, the design for this lathe was taken in two different directions by two student teams in a precision machine design class: one team designed a metrology system to measure the accuracy of the lathe, while the other team integrated a computer numeric control (CNC) system [1]. The objective of this project was to evolve the design of that CNC desktop lathe, making it less expensive, easier to assemble, and more accurate. To do this, elements from both the metrology lathe and the previous CNC lathe are integrated into the new design along with other improvements.
1.1 The Desktop Lathe for Use in a Project-Based Class
The lathe is one of the oldest, most well understood machining tools in existence, dating back to around 300BC as seen on an Egyptian carving [2]. Because it is so well understood, the lathe becomes an excellent teaching tool to help students learn the intricacies of mechanical and precision machine design.
Figure 1.1: A typical metalworking lathe.
As a standard machine shop machine, mechanical engineering students are already familiar with commercial versions of the lathe, allowing them to draw parallels between the machine they are used to working with and the machine that they design and make. Being able to build and
modify a familiar machining tool gives students the opportunity to see firsthand the effects of different changes. The lathe becomes a tool students use to learn mechanical design: how to design for manufacturing and assembly, how to debug, and how to minimize errors. With a commercial lathe as a paragon to compare with, students learn some of the pitfalls associated with machine design and how to get around them.
A desktop version of a lathe makes designing and fabricating a lathe more accessible to students than a full-sized student shop lathe. The smaller size is optimal because the cost of materials is significantly lower, allowing more student teams to explore customizations on a limited class budget, and it is also more suited to be fabricated in typical machine shops accessible by students, adding a practical, hands-on aspect to the learning. The difference in size also prevents students from directly copying from typical lathes found in machine shops but still gives a scaled system students can check with.
Integrating a CNC system into the desktop lathe also opens up many new areas of study from electronics and control to vibration isolation. This is important given the ever-increasing need for multi-disciplinary projects.
1.2 Previous Iterations of the Desktop Lathe
1.2.1 Elements of Mechanical Design, Spring 2007
During the spring semester of 2007, undergraduate students in Elements of Mechanical Design designed and specified parts of the first desktop lathe design for a project-based class. The lathe consisted of two one-inch aluminum slabs as head and tailstocks connected by a three-inch outer-diameter aluminum tube that also housed the lead screw and its flexure. Two rails supported the carriage and the cross feed flexure. This lathe measured approximately 15 inches in length and
Figure 1.2: An example of a Elements of Mechanical Design desktop lathe, Spring 2007. Teams of five to six students each designed and fabricated the spindle, the lead screw assembly and flexure, and the carriage rails. This incorporated bearing, bolt, and flexure design among other mechanical design elements.
1.2.2 Precision Machine Design, Fall 2007
The following semester, fall of 2007, two teams of four students in the graduate class Precision Machine Design took the desktop lathe project in two different directions. One team designed a metrology system to measure errors in the position of the spindle, carriage, and cross feed. The other team integrated CNC capabilities into the desktop lathe, designing motor placement, transmission systems, vibration isolation elements, a power supply, and a electronics control system [1]. This CNC lathe is the starting point for this next iteration's design.
1.3 Importance
The purpose behind redesigning the CNC lathe was to help students more effectively learn mechanical design in a project-based class. This hands-on, practical approach to learning is invaluable to a mechanical design education as it provides context on which students can base their design calculations and decisions, and then see the effects of their decisions. Typical theory classes usually give the students the values to use in solving a problem, but with this sort of project setup, students are forced to determine those values for themselves, something more applicable to industry work. Redesigning the CNC desktop lathe to make the lathe cheaper and easier to fabricate, along with increasing its robustness and accuracy, furthers this educational goal in a variety of ways.
By reducing the cost to fabricate each lathe, the project becomes more accessible to a wider range of class budgets, and therefore, a wider range of students. It does this both by making it possible for classes with lower budgets to run the project and by reducing the student to lathe ratio within each class. More students are then given the opportunity to work on more aspects of each lathe to gain experience designing different types of parts.
Making the lathe more robust and easier to fabricate also enhances the educational experience by reducing the effort needed to create the parts not designed by the student. The student can focus on designing and fabricating the parts of his or her own design, areas with more educational value in this type of project. By reducing the time and effort necessary to fabricate the lathe, more of the class time can be focused on other learning experiences such as testing, and the necessary timeframe for a project of this scope can be reduced. The rest of the lathe also becomes another example of good design the student can reference for his or her own designs as well.
Making the lathe easier to fabricate and assemble also allows students with a wider range of machining experience and skill to create an accurate and robust machine. By reducing the error inherent in the rest of the lathe, errors from parts designed by the student become more significant and easier to learn from. A more robust machine will help minimize error for longer periods of use as well as having other benefits. A robust design is more forgiving during fabrication and assembly, and is safer and stronger even with multiple assemblies and disassemblies a student is likely to do.
2 The Initial Redesign Process
2.1 Analysis of Previous Designs
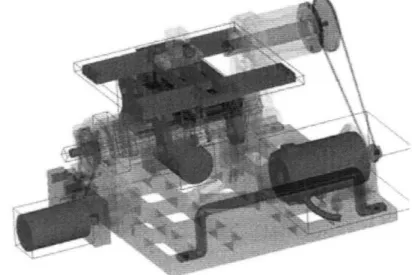
In designing the next iteration of the CNC desktop lathe, a few areas are focused upon: the actuator, lead screw, and carriage configurations. These areas are where the most improvement can be made.
Figure 2.1: Areas offocus for redesign: the actuator, lead screw, and carriage configurations. The current motor configuration uses a lot of extra material to mount the motors, greatly increasing the cost, fabrication time, and footprint of the lathe. To mount the spindle motor a set distance from the spindle, the lathe head and tailstocks are first epoxied to aluminum blocks to increase its height. This additional height creates enough clearance for the cross feed actuator to fit underneath the lathe. The head and tailstocks are then kinematically coupled and bolted to a 14-inch square plate of 1-14-inch aluminum. However, not only is this plate heavy, even when waterjetted into its webbed form, much of the space defined by its footprint is not even used by the lathe. Although the cross feed motor is nicely tucked underneath the carriage, the lead screw actuator sticks out the end of the lathe, adding another four inches to the overall length of the machine. Much of this configuration can be condensed and integrated into the rest of the lathe.
The vibration isolation mounts for the motor is also a major source of error in the machine. Although resistant to direct forces, the mounts were very compliant to shear and torsional forces,
allowing the spindle belt to skip during a cut. The same mounts are also used on the lead screw and cross feed motors, adding to the errors during a CNC cut by being too compliant.
The lead screw design used on the CNC lathe can also be reconfigured into a simpler form. Because the internal diameter of the structural tube is too large to directly mount the lead screw bearings, a tube-in-tube configuration is used. A smaller tube cut to hold the bearing seat and preload the lead screw is epoxied inside of the larger tube or braced on either side by additional aluminum caps. The advantages of this configuration include making the lead screw assembly a removable module that can be pre-assembled and then inserted into the rest of the lathe, and the lead screw is supported at its closest points, making it a stiffer member. However, the added complexity and part count used in this configuration is not worth the payoff. Other configurations give comparable effects at much lower costs.
The lathe carriage can also be improved upon. The large aluminum flexure is not optimized for the depth of cut the lathe would work with, and it slides over an aluminum carriage surface. This aluminum on aluminum sliding contact encourages micro-weld binding and should be avoided if possible.
2.2 Redesigned Assemblies and Parts
2.2.1 Actuator Configuration
The most obvious change to the CNC desktop lathe is the configuration of the actuators and the removal of the base. The extra standalone mount for the main motor driving the spindle is integrated into the headstock to completely eliminate the need for the large, one-inch aluminum base. Removing this base greatly decreases the overall weight and cost of the lathe, as a plate of that size, even with holes jetted out, is very heavy and expensive. In addition to reducing the part count, it also brings the motor closer to the center of the lathe as well as the axel it is actuating. In this position the lathe is more stable, and error from a stretching belt is also reduced.
Figure 2.2: The main actuator is mounted directly onto the headstock.
To integrate the motor in this way, a couple of changes are made to the headstock. The additional base for the kinematic coupling is removed and the headstock is extended to make up for the loss of height necessary to fit the cross feed motor under the carriage. The base is also wider to be able to completely encircle the motor; a slot is also cut out of the headstock for the motor to fit through. While most of the motor sits between the head and tailstocks, the drive shaft still sticks through in front to actuate the spindle. Although the tapped setscrew holes used to secure the rails could never be drilled from the top because the spindle mount of the headstock gets in the way of a drill, with the wider base drilling from the side was also no longer an option. Instead, the corners of the headstock are cut down tangent to the rail slots to give a nice flat surface to drill on.
The two parts used to mount the motor to the headstock are waterjetted out of sheets of aluminum without any need for post-machining, making mass fabrication a quick and simple matter. A slot is also cut out of the spindle housing for the actuating belt to slip in between the bearings, and the belt sits in a groove turned directly onto the spindle shaft.
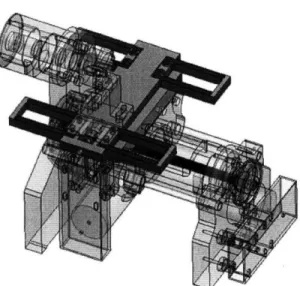
The lead screw actuator on the other end of the lathe is given a similar treatment to reduce the lathe's size; a slot is cut out of an extended tailstock and the motor is fitted through. Not only does this reduce the footprint of the lathe by a couple of inches while increasing stability, it also centralizes encoder and power leads for all three actuators to the same place behind the lathe,
creating a neater setup. Wires no longer run out of three sides of the lathe on the way to the control box.
Figure 2.3: The lead screw actuator orientation is flipped to decrease size and to centralize the ends of all three actuators.
2.2.2 Lead Screw Bearing Configuration
The lead screw bearing configuration is entirely changed to remove the tube-in-tube setup used on the CNC lathe, reducing part count and complexity significantly. Instead, the headstock and tailstock pieces are modified to create a shelf for the bearing seats to brace against.
Figure 2.4: The lead screw bearing setup.
The tradeoff here is that the tube and lead screw assemblies are not free standing assemblies that can be inserted into the center of the lathe; the headstock, tailstock, center tube, and
lead screw assemblies must all be assembled at once. Although slightly more complicated when assembling for the first time, the major problem with such a setup is if adjustments need to be made on the lead screw's preloading. Removing the end cap usually meant dismantling the whole lathe as the same bolts were used to hold both the tube and the end cap to the headstock. To prevent this from happening, another set of bolt holes are added around the lead screw on the headstock. This set allows the end cap to be removed without needing to loosen all of the structural bolts holding the lathe together.
The seats of the lead screw bearings are also cut to a depth so that the preloading nut sits outside of the surface of the head and tailstocks. This makes gripping them with tools to tighten them significantly easier than having to grip the nuts inside of the headstock and tailstock pockets.
2.2.3 Lead Screw Flexure
A couple of changes to the lead screw flexure make it easier to fabricate as well as more robust. Based off of the metrology lathe's flexure design, this flexure is designed to be as compact as possible while still having the necessary range of motion. To make fabrication of this part easier, the tapped mounting holes on the top are extended down into the next layer so that standard taps can reach down far enough. Finding a tap with a ground end is no longer necessary.
As a lathe designed for a classroom environment, assembly, disassembly, and reassembly are relatively common. However, the original flexure design was not designed for this repeated external manipulation, was relatively fragile, and the most common part to break. To prevent this, hard stops are added underneath the top rotational flexure. Enough space is given so that the flexure still isolates rotational forces on the cross feed carriage, but the flexure is stopped by the hard stops before plastically deforming, greatly increasing its lifespan when not protected underneath the carriage from curious fingers.
Figure 2.5: The lead screw flexure with hard stops.
2.2.4 Cross Feed Carriage
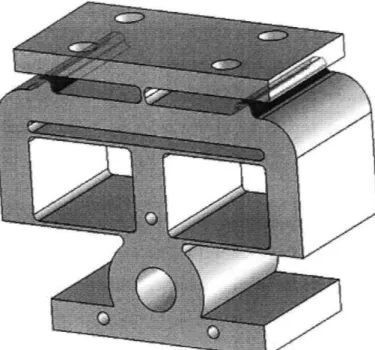
For the cross feed carriage assembly elements from both student teams' lathes are combined together. The optimized flexure design on a nylon carriage surface from the metrology team is integrated with the original CNC actuator assembly. This optimized design is more compact than the original CNC version and slides over the nylon surface instead of being elevated over an aluminum surface.
Figure 2.6: The nylon cross feed carriage and flexure.
2.2.5 Three-Jaw Chuck
A height increase of the tool holder and the headstock between the spindle and the lead screw is implemented to accommodate a new three-jaw chuck over the previous collet. This newer chuck holds the stock better, reducing errors in the cut part.
rzgure ./: An increased height on the headstock and tool holder make room for the chuck.
2.2.6 Chip Management
Instead of a chip cover with a felt-covered slot for the lead screw flexure to slide through, a bellows system is used for chip management. Sections of a bellows piece are connected from the head and tailstocks to the center carriage. While small chips can fall through the slot between the two felt pieces in the previous design, building up in the lead screw tube over time, this system effectively keeps all of the chips out of the lead screw tube during operation of the lathe. The
bellows also fold up and extend nicely on either side so that nothing gets caught and jammed on any moving parts.
3 The Prototype
3.1 Prototype Fabrication
Prototyping the redesign confirms the functionality of the design. As many pieces as possible are recycled from the previous CNC lathe, and the waterjet is used extensively to quickly
fabricate many of the other pieces.
3.1.1 Fabricated Parts
The headstock (Figure 3.1, 1), tailstock (2), lead screw flexure (3), spindle motor mount brace (4), cross feed flexure brace (5), and the tool holder (6) are cut from a 18"x18"x1" piece of
6061 Aluminum on the waterjet. Other than the motor mount brace, each of these other pieces also
require post-machining.
Figure 3.1: Parts cut from 1 " 6061 Aluminum.
Circle pockets are milled into the head and tailstocks for the center tube and the lead screw bearings. An additional pocket is milled into the headstock for the spindle housing. On both the head and tailstocks boltholes are tapped and counterbored, the rail holes drilled and reamed, and setscrew holes are drilled and tapped.
The lead screw flexure is initially jetted out in a stable configuration with additional material still intact in the corners. The appropriate holes are then drilled and tapped before this
additional material is bandsawed off.
The cross feed flexure brace is milled into its appropriate shape, and the tool holder boltholes are drilled and tapped.
The cross feed flexure is waterjetted out of /2" 6061 Aluminum plate and the appropriate bolt holes are counterbored.
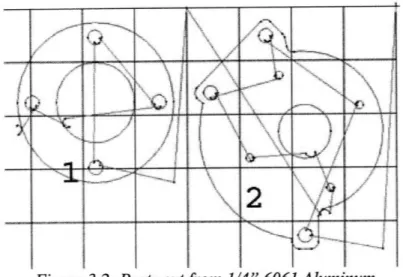
The lead screw end cap (Figure 3.2, 1) and the spindle motor mount (2) pieces are jetted out of ¼" 6061 Aluminum. Neither requires post-machining.
Figure 3.2: Parts cut from 1/4" 6061 Aluminum.
3.1.2 Modifications to Recycled Parts
Many parts from previous lathes are recycled to save on fabrication time, and some of these parts need modifications.
The stock nylon block (Figure 3.3, 1) used in other lathes needs appropriately placed holes drilled and counterbored. A groove is milled out from the front, and the bottom, front edge is chamfered on the bandsaw.
A slot is milled out of the stock spindle housing (2) for the spindle drive belt to fit though to the spindle shaft.
A pocket is milled out of the stock center tube (3) so the lead screw flexure will fit. As much material as possible is left on the tube to maintain its structural stiffness.
3
1
Figure 3.3: Modified recycled parts.
3.2 Prototype Testing
After assembly, the CNC lathe cut 15 parts using the same CNC program and the radius of the cut parts were measured. The parts had a standard deviation of less than 0.0006 inches. With a target max error of 100 microns (0.0039 inches) the process capability index (Cpk) was 1.014.
3.3 Alterations in Fabrication for Higher Volumes
Some changes can be made to the fabrication techniques when implementing the CNC redesign for a full class of students to reduce costs and student fabrication time. While the prototype made heavy use of the waterjet for quick fabrication, some parts can be sand cast instead. The one-inch aluminum plate used by the prototype is the single most expensive part other than the actuators themselves, and the large head and tailstock parts use the most of that material. These parts were sand cast for the Precision Machine Design class and could be cast again with updated drawings.
4 Conclusion
This iteration of the CNC desktop lathe effectively reduces the cost, size, weight, and complexity of the machine. The original 14"x20" footprint is reduced down to 9.5"x15". The material used in just the base of the original, one of the most expensive single parts of the lathe, is enough to fabricate every one-inch thick aluminum piece on the new lathe, including both the head and tailstocks. Redesigning the lead screw bearing configuration also reduces the part count and complexity by removing the original tube-in-tube configuration. These changes reduce the material cost of the lathe by about $250, reducing the original cost of the CNC lathe from $750 to $500 [1]. By reducing cost and complexity, these changes all help improve the CNC lathe design for use by a project-based class as a learning tool by making the project more accessible and more focused on student designs.
4.1 Summary of Changes
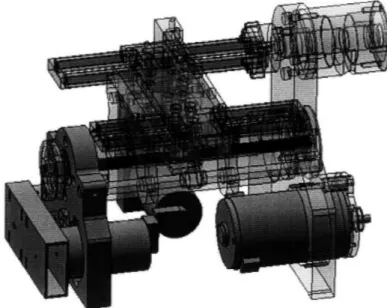
Changes made to the CNC desktop lathe are focused in three major elements: the actuator configuration, the lead screw configuration, and the carriage. The spindle motor and the lead screw motor are integrated into the head and tailstocks respectively to reduce material usage and the lathe's footprint. The lead screw assembly uses the head and tailstocks to hold the bearings to reduce part count. The carriage cross feed flexure is reduced in size and is set on a nylon surface.
Figure 4.1: The redesigned CNC desktop lathe.
Other changes include adding hard stops to the lead screw flexure to make it sturdier, extending the headstock to accommodate a new three-jaw chuck, adding a more effective bellow chip cover.
4.2
Future Iterations
Although this iteration of the CNC desktop lathe improves upon the previous, the design is far from optimal. Some changes could be implemented in the next iteration of the lathe to make improvements in a couple of areas. The current configuration of the cross feed is not particularly conductive for manual manipulation as the pulley runs along a stationary lead screw instead of the other way around. The addition of an encoder and timing belt onto the spindle actuator would also open up additional functionality of the CNC lathe, allowing operations like threading to be possible.
Other simpler changes include:
* Reshaping the head or tailstock so that the setscrews that secure the rails hit the rails at the same angle. This way the rails would only need to be flattened in one direction; there would be no need to figure out how to rotate the rail the correct amount between cuts.
* Currently the motor mount for the cross feed actuator is still a relatively complicated part to fabricate and could probably be simplified to some degree. * The bolt sizes can also be more standardized to make assembly easier.
References
[1] Cullinan, M, T. Grimley, M. Hale, D. Johnson, F. Tubilla, R. Panas, O. Welling, and Dr. M Culpepper. "Design and manufacture of a precision lathe by students in a project-based class." 2007
[2] King, Stuart. History of the Lathe: part one - reciprocal motion. [Online] May 5, 2008.
<http://www.stuartking.co.uk/index.php/history-of-the-lathe-part-one-reciprocal-motion/>.
Appendix A: Part Drawings
Appendix A describes the exact dimensions of the altered parts.
Figure Al: Center Tube
4 w tt
I:
ri.i:-
Iii
t
lii~ i; 1i
kjIjt
e i t it r n ~I " I ii $ E i s j t t jr a , _____i-::;::;:-::---: I;~Figure A3: Cross Feed Brace
t
Figure A4: Cross Feed Flexure
aO
1340
f ii s E~j L-~;--- Q I ··· - tSi>
4>~ ~r ·v* '·1·-~ a-"~I~ (N <0./t.9i A A "i ·· ; ~u~-, eFigure A5: Tailstock
.: . ...
Figure A6: Headstock
0 0
o
Figure A7: Lead Screw Flexure
i,
S0.00't, *Adc-J
13-i
Figure A8: Spindle Actuator Mount


