Diaphragm Control
in Inflated Tool Forming
of Composites
by
Arthur Russell von Waldburg
Submitted to the Department of Mechanical Engineering in Partial Fulfillment of the Requirements for the Degree of
Bachelor's of Science in Mechanical Engineering
at the
Massachusetts Institute of Technology June 1997
© 1997 Massachusetts Institute of Technology All rights reserved
May 9, 1997
Certified
by
...
...
Q---.
-
o y G e'ws
.
Cid by.13.0... Timothy George Gutowski
Leaders for Manufacturing Professor of Mechanical Engineering
Direc tor Laboratory for Manufacturing and Productivity
~/__,
,Thesis
Supervisor
Accepted by ...
/~/// Peter Griffith
Profesor/f Mechanical Engineering
Diaphragm Control
in Inflated Tool Forming of Composites
by
Arthur Russell von Waldburg
Submitted to the Department of Mechanical Engineering on May 9, 1997 in Partial Fulfillment of
the Requirements for the Degree of Bachelor's of Science in Mechanical Engineering
Abstract
Advances in material technology have given carbon fiber composites a high
strength and stiffness to weight ratios, making them an attractive resource for industry.
However, manufacturing parts from sheets of composite laminate is difficult. A forming
machine must prevent the laminates from draping over the tool to prevent thickness variations and supply the tensile and shear forces during forming to prevent part
wrinkling. The machine must also allow for the easy loading of laminates and removal
of formed parts. There are several methods of diaphragm forming in use, the most
promising of which is inflated tool forming.
Inflated tool forming relies on a diaphragm inflated around the tool to support the laminate during loading and apply forces during forming. Currently this process does not perform up to the industry's expectations. It may be improved by taking greater control over the diaphragm inflated around the tool.
Three methods of diaphragm control were explored through experimentation:
inflating multiple diaphragms, using dense fluid to inflate the diaphragm, and
constraining the diaphragm from within. Internal constraints are the most promising method of diaphragm control.
Thesis Supervisor: Timothy George Gutowski
Title: Leaders for Manufacturing Professor of Mechanical Engineering Director Laboratory for Manufacturing and Productivity
Table of Contents
Introduction
Controlling the Diaphragm
Experimental Procedure Results Conclusions Appendix A Appendix B References 4 9 15 21 28 30 31 51
Introduction
The stiffness and strength to weight properties of make fiber composites
attractive to the aerospace and sporting goods industries. Modern composites are made of a reinforcement material and a binder material, in many cases high strength fibers are embedded in a more compliant matrix. An example in widespread use is carbon fiber. Carbon fiber has a tensile strength typically between 3.1 to 5.5 GPa (450 to 800 ksi), a
stiffness on the order of 240 GPa (35 Msi), and a specific gravity of 1.7. Thus the fiber is stronger than 7075 aluminum by a factor of 5 to 10, 3.5 times stiffer, and weighs 60
percent as much. These fibers are embedded in a thermosetting polymer such as epoxy.
Typical cure temperatures are between 121 and 1770 C (250 to 350°F). Unfilled epoxy has a tensile strength of 27.5 to 89 GPa (4 to 13 ksi), a flexural strength of 89 to 144 GPA (13 to 21 ksi), and a specific gravity between 1.11 and 1.40. Recently developed
high-toughness epoxies are resistant to damage due to accidental impact. Thus the epoxy effectively binds the fibers together, but adds little in terms of strength or stiffness.
The attractive material properties of fiber composites are offset by their costs.
Current costs for carbon fibers are several times to an order of magnitude higher than that of aluminum. The costs differential implies that composite materials will be used in demanding applications where their increased performance justifies their higher cost. However, material cost is only a portion of total product cost. In many applications it
has been possible to form composite parts with significantly fewer individual components
compared to metallic structures, thus reducing overall costs dramatically. The difficulty here is that industry has yet to find a low cost method of forming many types of
composite parts.
Continuous fiber materials is available in partially cured rolls. The rolls
represent a single ply of the composite. Many fibers (up to 12,000) with a thickness of 5 to 7 m (0.0002 to 0.0003. in) are gathered together in the manufacturing process to form
a tow or yarn. These tows are coated with the matrix material in a process called
prepregging and partially cured to form a ply, or sheet of composite. These sheets
contain a number of tows through their thickness. Typically a ply is 60 percent fiber by volume. To prevent unwanted curing, these rolls of composite must be kept refrigerated until used. During prepreg lay-up individual plies of prepreg are laid together, using a
tool to control part geometry. The plies are laid in a pattern determined by classical
lamination theory such that their angles between their respective fibers result in the desired strength and stiffness characteristics of the product. Thus strong, thick parts consist of many plies.
Automating the lay-up process has been difficult due to the in-plane shear forces
necessary to prevent wrinkling as each ply is formed over the tool. The combination of
bending and shear forces necessary to form an align fiber ply to any complex shape
'topologically' equivalent to a fiat sheet were described by S. Tam and T. Gutowski in
their 1990 paper. In a special case, the in plane shear forces on a single fiber, F12, can be
described by'
r12 = k,ds
= -JKdA =
-K(R) (1)C3
where r12, the in-plane shear, along a fiber path, C3, over the geodesic curvature of the arcs, kg, is related to the total curvature, KT, over the region R. These paths are described in Figure 1. If the necessary shear forces are not achieved, the composite wrinkles during forming. Wrinkles are undesirable because they detract from the strength of composite materials and act as stress risers.
Automated forming must also create precise parts to be feasible. This is achieved by controlling the shape variables during forming. If the part shape is not constant, the imprecision drives up the price of assembly by requiring unique shims to be placed
'From Albert S. Tam and T. Gutowski, "The Kinematics for Forming Ideal Aligned Fiber Composites into
Figure 1: By carefully choosing the closed
contour C, Cl and Ca
become fiber paths and
C2 and C4are orthogonal geodesic paths. This special case allows the shear in Cl to be determined.
between parts. The three current forming machine designs each embody different trade-offs between wrinkle prevention and part precision.
Drape Forming
The drape forming process creates parts by pulling the laminate over a tool using. a single diaphragm. The laminate is laid on top of the tool, then a diaphragm is used to seal the machine as shown in Figure 2. Pulling a vacuum in the chamber causes
the diaphragm to form the prepreg over the tool. The top loading machine allows
laminates to be created through successive runs and the finished part to be removed easily. However, drape forming does not work well for large parts because the laminate droops over the tool before forming, creating thickness variations by stretching the laminate unevenly. One way to prevent drooping is to invert the process. But, as Figure 3 shows, inversion makes it necessary to lift the tool before loading the machine with prepreg, or removing the finished
I I
Figur 2 Fiure Diaphragm
A,
X/ / -
Laminate
Loading Tool D///p Laminate Diaphragm \Figure 2: The drape forming machine uses a single diaphragm to mold parts over a
tool. There drooping inherent in loading this machine is removed by inverting the process as shown in Figure 3. However, this inversion necessitates the movement
of the tool during loading and unloading of the machine.
product. Repeatedly lifting large tools is cumbersome and time consuming.
Double Diaphragm
A way to support the laminate prior to forming is with a double diaphragm. In this machine, the laminate is sandwiched between two diaphragms as shown in Figure 4. The lower diaphragm prevents the prepreg from drooping and the sandwich effect supplies additional shear during forming, making it possible to form thicker laminates (more plies) with each run. Because it is between the laminate and the tool, the second diaphragm also makes the parts imprecise by introducing its thickness as a variable in forming. Any addition plies added with this machine in subsequent runs are done with
drape forming because the lower diaphragm is trapped between the laminate and the
tool. The lower diaphragm also makes it difficult to remove formed parts from the
machine without damaging them.
5/
- |
Figure 4: The double diaphragm machine supports the laminate with a second diaphragm
during loading.
Sandwiching the laminate
between diaphragm
increases the shear force
applied during forming,
preventing wrinkles, but makes the parts imprecise
by trapping the lower
diaphragm between the laminate and the tool.
Inflated Tool
The most promising method is inflated tool forming. In this process, a diaphragm is inflated to support the laminate as it is loaded into the machine. Then a second
diaphragm is placed on top of the laminate. In theory, pulling a vacuum between the diaphragms will provide the sandwich effect of double diaphragm forming while providing the easy loading/unloading and precision of drape forming. In practice, the lower diaphragm does not inflate to completely fill the space around the tool. The
rounded diaphragm inflation observed (Figure 5) provides incomplete support during loading and may even pinch the laminate, creating wrinkles during forming2.
Inflated tool forming may be improved through better control of the lower diaphragm. Ideally the diaphragm would inflate to fill the entire chamber, providing a flat surface to support the laminate during loading. Then apply shear forces to the laminate through tension in its surface as it deflated as seen in Figure 6. The three
methods of control I examined are inflation with dense fluid, multiple diaphragm inflation, and inflation against internal constraints.
Laminate Diaphragm Diaphragm //Tool/
\ \ \\ \ \
\k~x
\
\\\ \~ \ \
(
\
\ X
RX'
- - - -_ .Figure 6: An ideal inflated tool machine provides a flat bed onto
which the laminate is loaded, and sandwiches the laminate, providing
additional shear forces during
forming.
Figure 5: In inflated tool forming, a diaphragm is
inflated around the tool to provide support
during loading and
additional shear forces
during forming. In
practice, the inflated diaphragm provides only a point of support, and
does not effectively
sandwich the laminate. In fact, its rounded shape may pinch the laminate during forming, thus creating
wrinkles Pinching Diaphragm a
Laminateaphragms
Diaphragms Diaphragm Laminate~'1,-
' nC
1,
\\\\\9
Tool-
_I
Diapragm''\\W~\\\\\\\\\\\\\\\
Diaphragms -lControlling the Diaphragm
An uncontrolled diaphragm deforms in response to the stresses created by an evenly distributed lateral load (pressure) on its surface. Neglecting changes in diaphragm thickness, the stresses, a, in the diaphragm can be modeled as the stresses in a plate under evenly distributed load3:
2
wx
or = k t2 (2)
The resulting deformation, y, is
y=k2 w(R
-
(3)Et2
In both equations w is the evenly distributed load (pressure), t is the thickness, and x denotes the position on the diaphragm. E is the young's modulus of the diaphragm. The definitions of R, kl, and k2 are determined by the shape and size of the diaphragm as well as the manner in which its edges are anchored. For a circular diaphragm fixed on all edges (Figure 6), R denotes the radius, kl=0.71, and k2=0.171. Additional definitions of R and the empirical constants (kl and k2) are in Appendix A.
Figure 6: A circular diaphragm fixed at the edge.
Diaphragm control is needed to provide a flat surface to support the
laminate during loading of inflated tool machines, and to exert shear forces on the laminate through tension in the diaphragm.
Fluid Inflation
Using a dense fluid to inflate the diaphragm flattens the diaphragm deformation by exerting an uneven load on the diaphragm surface. When filled with a dense fluid, the pressure, P, at any point on the diaphragm will be the sum of a base pressure, Po, and the height of the fluid column, h, at that point
P = P + ph
.
.
(4)
Approximating the height as the difference between the maximum height and the height at point x in an uncontrolled diaphragm yields:
h=k
-t'
k t = k2 P(R4 - 4) (5)2 Et E
Then substituting Equation 5 into Equation 4 gives the pressure in the diaphragm
as a function of- x:
P
=
Po
+
2
E-(R
- )
(6)
Substituting Equation 6 into Equation 3 gives the deformation of a fluid filled diaphragm
k
= k E)t.
po + pk2
Et(R - ¢ )] (7)Et Et3
This is shown in Figure 7. The degree to which diaphragm inflation is flattened is determined by the ratio of fluid density to the diaphragm's Young's modulus. Higher ratios yield greater flattening of the diaphragm.
--
a--column height in a diaphragm
Multiple Diaphragms
With Prof. Christine Bordonaro, the use of multiple diaphragms in the lower portion of the inflated tool forming machine was developed. When diaphragms expand into the same space they are constrained and deflected. Figure 8 highlights the contested
volume between diaphragms. The force one diaphragm exerts on another is determined
by the internal pressure, the relative elasticity (determined by thickness of similar diaphragms), and the friction between the diaphragms. Due to its complexity, this model was left to be determined empirically.
pot_' ... s. A cerl.---r lgucerl.---re o; vnuen
perpendicular
diaphragms are inflated, they expand into the
same space. The
interaction at this point is determined by
relative elasticity and friction between the diaphragms -R x 0 R d Space _· viamrp ! Rl'"ir i I
Internal Constraints
Internal constraints limit the vertical deformation of the diaphragm. A pattern of constraints across the diaphragm will define the surface of the diaphragm when the length of the constraint at point x, 1s, is less than the uncontrolled deformation of the
diaphragm at that point. Thus control is exerted over the diaphragm surface when PX4
I <k2 (7)
Et
Vertical constraints of the same length will create a flat surface on the diaphragm, as seen in Figure 9. Figure 10 illustrates that this method of diaphragm control can be
Figure 9: A flat surface being dictated to a diaphragm via internal constraints of the same length.
modeled as two uncontrolled diaphragms mounted on slopes which connect a raised
platform to a fixed base. The expansion of these two diaphragms can be described by
y, = k ( E 3 + tana,d, (8)
where a is the angle between the fixed base and the slope to the raised platform, x is the position on the diaphragm, and d is the distance between the point where the diaphragm is fixed to the base and the point at which it is simply supported by the platform. The uncontrolled portions of the diaphragm should expand to fill any gaps between the tool and the controlled portion.
Threads
Figure 10: Internally
constrained
diaphragms can be modeled as a raised
platform between two
inclined, uncontrolled
diaphragms.
The effectiveness of these methods at controlling the diaphragm during inflation
and deflation was determined through a series of experiments.
/ Platform y1- '~X4 '1-, P
- ,
Uiapha
Uncontrolled Diaphragms-Testing Procedure
The same apparatus was used in each test of diaphragm control. A small model
of a forming machine, shown in Figure 11, was used to house the experiments. The box has holes drilled in the bottom and one side. Diaphragms were place over these holes and sealed to the box by bolting aluminum collars over them. Air or fluid was supplied to the diaphragms through the holes. The diaphragms used in these experiments were 1/6o and /lSi inch thick latex. Latex has a Young's modulus of about 6.89 Pa (10-3 psi). Set at 0.7 Pa (10 psi), the lab's air supply was used as a pressure source. Each test was
documented on video.
Figure 11: An exploded view of the testing apparatus showing the input holes, sealing collars, gaskets and bolts.
Fluid Inflation
The horizontal diaphragm was inflated with fluid by pressurizing a water-bottle connected to the hole at the bottom of the test apparatus. As shown in Figure 12, a straw ensures that the test fluid rather than the air used to pressurize reservoir is
5 I 1 4 1 I I . ___ 1 t I
Figure 12: Fluid is forced into the horizontal diaphragm through a
straw when the reservoir (water bottle) is pressurized with air.
pumped into the diaphragm. The diaphragm was inflated with water, using air as a control. The densities of these fluids are in Table 1. Inflation of the diaphragm was limited by the volume of the water bottle.
Air Water
Fluid
p (kg/m3 ) 24 1,000
Table 1: Densities of fluids used for diaphragm inflation.
Multiple Diaphragms
Tests of control using perpendicular diaphragms examined the effect of relative thickness, inflation order, and friction on the diaphragm interaction. Connecting air hoses to both the horizontal and vertical diaphragms through additional valves, see Figure 13, provided control over the inflation sequence. The tests listed in Table 2 were performed, using different combinations of diaphragm thickness and inflation sequence then repeated, using petroleum jelly to reduce the friction between the diaphragms. The dry tests had to be performed before the low friction tests because the petroleum jelly degraded the latex diaphragms.
Diaphragm Base -/ 1\ Control Air Needle Fluid Level l
-LStraw
.JirFigure 13: The air supply is split and directed to the horizontal and vertical diaphragms through two additional valves.
Test # Horizontal Vertical Thickness Inflation Order Interface
Thickness (in) (in)
1 1/50 1/50 Together Dry
2 1/50 , /50 Horizontal First Dry
3 1/50 t/so Vertical First Dry
4 1/50 1/50 Together Petroleum
5 1/50 1/50 Horizontal First Petroleum
6 '/50 /50o Vertical First Petroleum
7 '116 1/50 Together Dry
8 _l6 t/so Horizontal First Dry
9 '/16 1/50 Vertical First Dry
10 1/6 t/so Together Petroleum
11 1/16 1/50 Horizontal First Petroleum
12 t/16 L/50 Vertical First Petroleum
13
50
Together
Dry
14 1/50o 16 Horizontal First Dry
15 1/50 '/16 Vertical First Dry
16 T/o 1/16 Together Petroleum
17 I1/50 /16 Horizontal First Petroleum
18 1/50 t/L6 Vertical First Petroleum
Table 2: Tests carried out with perpendicular diaphragms
Internal Constraints
Internal constraints were fabricated by sewing the diaphragms to a stiff base usixig nylon cord. During the sewing process, the diaphragm was separated from the
Test
Apparatus
base by a flat piece of Styrofoam. This is shown in Figure 14. The stitching was then painted over with pre-vulcanized liquid latex. After the diaphragm was sealed, the Styrofoam was dissolved using acetone. Without the Styrofoam, the diaphragm lays flat
against the base until pressurized as seen in Figure 17.
Figure 14: Nylon threads were stitched through foam into a stiff tagboard base using a sharpened darning needle with a hole drilled in it.
Figure 15: Dissolving the foam with acetone leave the diaphragm able to be
compressed against the stiff base, yet constrained vertically by the nylon threads.
LsJs
.
..,2·:- ··ii -" ?- ' .· · ... iSR
Several problem arose to complicate the process. Styrofoam dissolved into a
sticky taffy-like substance, necessitating its replacement with poly-urethane foam. Experiments showed that the poly-urethane foam dissolved into a slimy substance resembling wet paper, making it much easier to remove from between the threads. Then the pre-vulcanized liquid latex did not adhere well to the latex diaphragms at high pressure, nor did the threads remain parallel when the diaphragms were inflated, as illustrated in Figure 16. These problems were solved by stitching fabric to the stiff base through the poly-urethane foam, then form a diaphragm on top of the stitching, thus incorporating the stitching and fabric into the diaphragm. This process uses the
inextensible properties of the fabric to keep the diaphragm from expanding between the threads, keeping them parallel and using one-step diaphragm forming to creates
diaphragms able to withstand higher pressures. One such diaphragm is shown in Figure 17. In this process, it is important to prevent thickness variations in the
diaphragm and eliminate bubbles in the liquid latex. Both of these faults create weak points in the diaphragm.
Figure 17: The diaphragm expands between the stitches, bringing them out of
alignment. The dispersed threads created large 'air mattress' effects on the surface of the diaphragm.
Once fabricated, the internally constrained diaphragms were placed on the horizontal surface of the testing apparatus and inflated.
Results
The three methods of controlling diaphragms met with varying degrees of success. Included here are the most dramatic stills from the video documentation. Stills from all the tests can be found in Appendix B.
Fluid Inflation
Using fluid to inflate the horizontal diaphragm did not yield dramatic results. The diaphragm was only slightly flatter when filled with water than when filled with air. This can be seen by comparing Figures 19 and 20. The control over the diaphragm would increase if the linear effect of hydrostatic pressure dominated the exponential expansion of the diaphragm.
Figure 20: Diaphragm inflated with water. Density of water is 1000 k/,3
Multiple Diaphragms
Multiple diaphragm inflation yielded some interesting results. When the diaphragms are the same thickness (have the same elasticity) inflation order is a dominant factor in their interaction. The diaphragm which is inflated first is deflected by the second diaphragm as seen by comparing Figures 21 and 22.
Figure 21: Diaphragms of the same thickness with the horizontal diaphragm inflated first
Though inflated at the same pressure, the thicker diaphragm displaces the
thinner diaphragm, regardless of the inflation order. However, Figures 23 and 24 show that when the thicker diaphragm is inflated first, the thinner diaphragm inflates around it, but when the thicker diaphragm is inflated second, the thinner diaphragm is pushed aside. The dry, horizontal first test with tH = l/5o" tv = I/16." seen in Figure 24, shows the most dramatic effect on diaphragm shape with the minimum upward deflection. This test was the closest that multiple diaphragm - inflation came to creating a flat loading surface while almost completely filling
the expansion chamber.
Figure 24: The diaphragms nearly fill the expansion chamber with nearly no upward deflection when the thicker, vertical diaphragm is inflated second
Internal Constraints
The internally constraints were very successful at controlling the surface of the diaphragm. Though the stitched diaphragms exhibited dramatic expansion between the threads, The diaphragms with imbedded fabric were remarkably flat on top as shown in Figure 25. The uncontrolled portions expanded to fill the chamber. This expansion is shown against a tool in Figures 26 and 27.
Figure 25: Internally constrained diaphragms with imbedded fabric were remarkably flat on top.
Figure 26: Side view of an internally constrained diaphragm with imbedded fabric expanding against a tool.
Figure 27: Top view of an internally constrained diaphragm with imbedded fabric expanding against a
Conclusions
In these experiments, neither fluid inflation, nor the use of multiple diaphragms
proved to be a feasible method of controlling the lower diaphragm in inflated tool
forming. In order for fluid inflation to have a dramatic effect on diaphragm shape, the
fluid density to diaphragm elasticity ratio would have to be very high. To achieve this, a
heavy fluid such as mercury would have to be used in conjunction with a very thin membrane. The combination of rupture prone thin diaphragms and hazardous fluids is unattractive to manufacturing in comparison to other options. Multiple diaphragm inflation also has potential. With the right combination of thickness and sequence, dry diaphragms could be inflated to form a relatively flat surface for laminate loading. But the diaphragm interaction weakens as they are deflated during forming. This function of multiple diaphragm inflation would make it very hard to control the in-plane shear on the laminate during forming.
Using diaphragms with internal constraints is the most promising method of
improving inflated tool forming. The threads give the diaphragm a clean, flat surface
which will completely support the laminate during loading. The unconstrained portions of the diaphragm fill the gap between the tool and the diaphragm as has been illustrated in Figures 26 and 27. The ability of the threads to shape the diaphragm also opens the
door to controlling the diaphragm during deflation. Since the threads control the surface by limiting vertical expansion, shortening the threads as pressure in the diaphragm
decreases will maintain control. Thus dynamic threads must maintain
Px4
< k, E3 (9)
in order to maintain control of the diaphragm surface. Through active threads the user would have control over the tension in the diaphragm and thus the in-plane shear in the laminate.
Through the used of internally constrained diaphragms, it may be possible to create wrinkle free parts with high precision.
Appendix A
Empirical constants and definitions of R for expanding plates4
-R_· _- . -R ;41 (21 '32 St -R _ i
-R-
~~~~~~-9--ir ) (J) 062 '}1 38) :9 > R_ 9- ---t (11) (12--R
i ~r~~'R
; {' 41~~341 3 ) R.r - ... - R-p6) AReC, ,sry (iT) Rec, f,.ea r olt
sotea o o all edges
edges
1t8)Aecal. siply (19)Rct.. Imfad on one
%eaonea on 9e9 r. S twe edges: suppooet on Octhe
one edge R ree ie adge. 'i- :(2il 2li 3 Sam %(20) b
-- 9R- R -- 1,R (20)Rect.. 6fxe on o oooile edges t at smpy suDDone on omer 1t eges R. 123)50me or, (22) b r>R 21Rect, s.,my Qrted on all edge
'24]Zah.coa.29 mtopr (25)bome os 324) bi
osns, 2r nrwo oa o feed Wlong ea
eOwamly too6a,
Circular plates. Cases (4), (5), (6), (7), (8) and '_ -__
(13) have central hole of radiusr, cases (9), (10), (11). (12), (14), and (15) have a central
piston of radius r to which the plate is fixed Rectangular and eliptical plates. [R is the
-..- - longer dimension except in cases (21) and (23)
Cms k l-1 1 24 0.696 2 0.75 0.171 3 6.0 4.2 Rlr 1.25 1.5 2 3 4 Case A, t t, i A, i ,i k k, 4 i, 4 0.592 0.184 0.976 0.414 I1.O10 0.664 1.880 0.824 .08 0.830 2.19 0.813 5 0.105 0.0025 0.259 0.0129 041 0.057 0.654 0.130 0.708 0.163 0.730 0.176 6 1.10 0.341 1.26 0519 1.48 0.672 1.88 0.734 2.17 0.724 2. 0.704 7 0.195 0.0036 0.320 '0.0244 .455 0.081 0.670 0.171 1.00 0.218 1.30 0.238 8 0.660 0.202 1.19 0.491 2.04 0.902 3.34 1.2n 4.10 1.300 5.10 1.310 9 0.135 0.0023 0.410 0.0183 1.04 0.0938 2.15 0.293 2.99 0.448 3.69 0.54 10 0.122 0.00343 0.336 0.0313 0.740 0.1250 .21 0.291 1.45 0.417 1.59 0.492 41 0.072 0.00068 0.1825 0.005 0.61 0.023 0._46 0.064 0.627 0.092 0.668 0.11 12 6865 0.2323 7.448 0.6613 ' 8.136 1.493 8.71 2555 8.930 3.105 9.036 3.418 13 6.0 0.196 6.0 0.485 6.0 0.847 6.0 0.940 6.0 0.801 6.0 0.658 14 0.115 0.00129 0.220 0.0064 0.05 0.0237 0.703 0.062 0.933 0.092 1.13 0.114 15 0.090 o.o0077 0.273 0.0062 0.7)0 0.0329 1 s4 0.110 2.23 0.179 2.80 0.2-4
Coefficients for Circular Plates
Rlr 1.0 1.5 2.0 3.0 4.0 C s i, i k, t i, i t, k i, 16 0.287 0.043 0.487 0.0843 0.610 0.1106 0.713 0.1336 0.741 0.1400 17 0.308 0.013. 0.45. 0.0240 0.497 0.0o2 0.500 0.028 0.500 0.02S 1s 0.672 0.40 0.768 0.160 0.792 0.165 0.798 0.166 0.800D 0.166 39 0.500 0030 0.670 0.070 0.730 0.101 0.750 0.132 0.750 0.139 20 0.41 0.0209 0.626 0.0582 0.715 0.097 0.750 0.1276 0.750 21' 0.418 00216 0.490 0.0270 0.497 0.024 0500 o0.m 0.500 0.0284 22 0.160 Q0.021 0.0421 0.320 0.0553 0370 0.0668 03 0.0700 23' 0.160 .Z20 0.260 0.0436 0.340 0.0592 0.A30 0.0772 0.490 0.0908 24 1.24 0.70 1.92 1.26 2.26 1-58 2.60 .s 2.78 2.02 25 0.75 0171 3I.4 0.304 1.63 0.379 1.84 0.419 1.90 0.431 L rmo a r -I 1d 23.a
Coeficients for i.ectangular and eliptical plates
I i
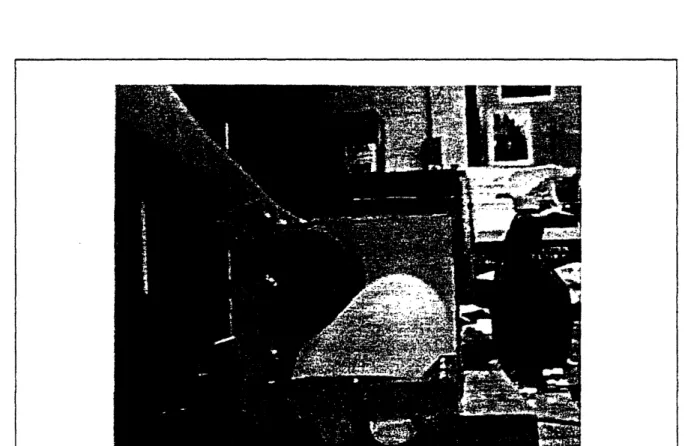
Appendix B
Stills created from the video documenting these experiments in diaphragm control tH = Horizontal Thickness, t = Vertical Thickness
Figure 28: t = 1/5o" Fluid = Air; density = 24 kg/m3
Figure 33: t = /50" t = 1/so" Horizontal First Dry Interface
Figure 35: tH = /5o" tH = I/o" Vertical First Dry Interface
Figure 37: tH = /s0o" t = /wo" Inflated Together, Petroleum
Figure 39: tH = /5o" tH = 1/5o" Horizontal First, Petroleum
Figure 41: tH = /so" tH =- 'o" Vertical First, Petroleum
Figure 44: tH = 1/16" t = /5o" Horizontal First, Dry Interface
Figure 48: tH = '/ls" tH = 1/5o" Inflated Together, Petroleum
$-~llrrrr c~
Figure 50: tH = 1/16" tH = 1/5o" Horizontal First, Petroleum
ite i ..
i_ [ r
Figure 52: tH = 1/1" tH = 1/o0" Vertical First, Petroleum
..
fc-F.- <n;;"i.
.
"ON = a il .r-Figure 54: tH = Iso" tH = %'6" Inflated Together, Dry Interface
Figure 56: tH = /io0" tH = 1/16" Horizontal First, Dry Interface
Figure 58: t = /so" t = 6/l" Vertical First, Dry Interface
Figure 60: tH = /50" tH =
'1/6"
Inflated Together, PetroleumFigure 62: tH = 1/50" tH = 1/16" Horizontal First, Petroleum
Figure 64: tH = 1/so" tH = 1/1s" Vertical First, Petroleum
Figure 65: tH = 1/so" tH = 1i/s16" Vertical First, Petroleum
Figure 66: Internally constrained diaphragm with imbedded fabric
References
Tam, Albert S. & Timothy Gutowski, 'The Kinematics for Forming Ideal Aligned Fibre Composites into Complex Shapes" Composite Manufacturing Vol. 1 No. 4 December 1990
Avallone, Eugene A. & Theodore Baumeister HII, Marks' Standard Handbook for
Mechanical Enginees 10m Edition, McGraw-Hill, New York, NY 1996