Design of an Endoskeleton Ski Boot By
Jason D. Pier
Submitted to the Department of Mechanical Engineering in Partial Fulfillment of the
Requirements for the Degree of Bachelor of Science
at the
Massachusetts Institute of Technology June 2013
C 2013 Pier All Rights Reserved
The author hereby grants to MIT permission to reproduce and to distribute publicly paper and electronic copies of this thesis document in whole or in part in any medium now known or
hereafter created.
Signature of Author: ...
Department of Mechanical Engineering May 10, 2013 C e rtifie d b y ... ... Kim Blair Research Affiliate Thesis Advisor Accepted by ... - .. . . . . Annette Hosoi
Professor of Mechanical Engineering Undergraduate Officer
Design of an Endoskeleton Ski Boot
byJason D. Pier
Submitted to the Department of Mechanical Engineering on May 10,
2013 in Partial Fulfillment of the Requirements for the Degree of
Bachelor of Science in Mechanical Engineering
ABSTRACT
The design of ski boots changed continually from the 1950's until the 1980's, at which point ski boot manufactures started making a plastic shell around a soft liner. This design, which hasn't changed significantly in the last three decades, has a few underlying problems that prohibit it from ever having an optimal combination of comfort and performance. These problems are
caused primarily by the need to hold the foot through the insulation, thereby packing out and thinning all insulation in the boot. A new boot design is proposed here that would solve this problem by featuring a skeletal design instead of a shell, which would be located inside the insulation.
This new ski boot design features structural "beams" that encase the foot and the lower leg. These beams are close to the foot and leg, thereby holding it tightly. By controlling the thickness of the structure, it can be made to match the natural flex of the ankle. A rotating front part would be used to set the forward lean. An enclosure around this entire structure would be held tight by straps and Boa laces. An analysis of this design showed that carbon fiber was a strong enough material to make the boot, and the model was adjusted to feature a
~4mm displacement when a 145N force was applied.
Thesis Supervisor: Kim Blair
Acknowledgements
I would like to thank Dr. John Pier, who first came up with the idea for an endoskeleton based
ski boot and came up with the very first design iteration. Also, thanks to Eli Pier for the first drawing of the endoskeleton boot.
Second, I would like to thank my thesis advisor Dr. Kim Blair for his help with this project. His passion for engineering and science within the sports world is worthy of admiration.
Next, I would like to thank my family. I couldn't be anywhere near where I am today without their constant support. To my mother, Karen, who constantly and continually nagged me to
continue working and to my father, David, who in a ten minute phone call gave me a history of the ski boot from 1950 to 1980 including specific companies and models, I'd like to say thanks for all the hard work to help me along the way. To my older brothers, Tim and Eric, I'd like to say thanks for giving me the inspiration (and proof) that it actually is possible for me to get through 4 years of college (mostly) successfully.
Lastly, I would like to thank God and Jesus Christ for helping to restore my peace of mind every time I lost it.
Table of Contents
1. Introduction
...
91.1 Background and Evolution of the Ski Boot ... 9
1.2 M otivation ... 15 2. Design - "Endoskeleton ... 17 2.1 Encloskeleton Structure ... 17 2.1.1 Sole ... 19 2.1.2 Foot ... 19 2.1.3 Flex Point ... 21 2.1.4 Lower Leg ... 22
2.2 Rotating Shin Support ... 23
2.2.1 Force Transfer ... 25
2.2.2 Forward Lean ... 27
3. Enclosure and Fit ... 29
3.1 Foot ... 29 3.2 Rear Enclosure ... 32 3.2.1 Heel Strap ... 32 3.2.2 Upper Strap ... 33 3.3 Upper Enclosure ... 34 4. A nalysis ... 35
4.1 Verifying Stress Concentrations and Deform ation of the Boot ... 35
4.2 Flexion and M aterial ... 37
S. Next Steps and Future Potential ... 40
5.1 Extended Analysis ... 40
5.2 Injury Prevention ... 40
List of Figures
Figure 1: A pair of ski boots from the 1950's... 9
Figure 2: Professional Swiss skier Didier Cuche's last run... 10
Figure 3: A ski boot made by the company Reiker ... 10
Figure 4: An ad for the Raichie "Red hot" boot... 11
Figure 5: Lange Com p 11 and Pro 11 ... 12
Figure 6: A few examples of rear entry boots from the 1970's... 13
Figure 7: Released in 1982, the Lange XL-R is very similar to modern ski boots. ... 13
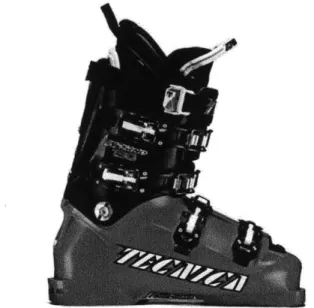
Figure 8: A modern ski boot made specifically for racing by Tecnica.. ... 14
Figure 9: Two similar Raichle boots, three decades apart. ... 15
Figure 10: A carbon fiber AFO... 17
Figure 11: The final design... 18
Figure 12: The sole of the new design... 19
Figure 13: The sole and lower structure of the endoskeleton... 20
Figure 14: The flex point of the boot ... 21
Figure 15: Lower Leg section of the endoskeleton... 23
Figure 16: The front part of the boot ... 24
Figure 17: The connection for the rotating shin piece ... 24
Figure 18: The buckle system to be used on the rotating front part ... 25
Figure 19: Force diagram of endoskeleton under pressure. ... 26
Figure 20: Exaggerated differences in possible forward lean settings... 28
Figure 21: The boot with the parts of the enclosure labeled... 29
Figure 22: Example of enclosure around the lower section of the boot... 30
Figure 23: The Boa lacing system ... 31
Figure 24: The heel strap...4 ... ... ... ... 32
Figure 25: The top strap... 33
Figure 26: Stress concentrations in skeleton... 35
Figure 27: The relative displacements in the skeleton... 36
Figure 28: Measurments of forces on a boot while skiing ... 37
Figure 29: Displacements of skeleton made of High Density PE... 38
1. Introduction
Ski boots have undergone many changes since the 1950's, when the sport first started growing in popularity around the world. However, most of these changes occurred between
1950 and 1980, with significantly fewer changes since then.
1.1 Background and Evolution of the Ski Boot
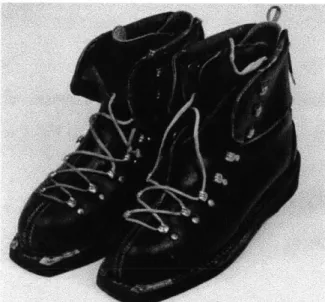
In the 1950's, the ski boot consisted of hard leather lace-up boots. See Figure 1 for example of this boot.
Figure 1: A pair of ski boots from the 1950's featuring a leather design with a laced enclosure!
The laced leather boot design had several problems. First, the boot was low cut, allowing too much movement in the ankle as the ski bounced over rough terrain. As the ski bounced and slid over bumpy snow, the skier was unable to keep it steady because of the lack of sideways leverage. In addition, both because of the low cut design and the lack of enough stiffness in the leather, the skier could bend their ankle forward and backward too easily. This meant that the there was little to support the skier and keep them upright, limiting what the skier could do on
snow.
Figure 2: Professional Swiss skier Didier Cuche went out with a bang when he skied his final professional run in 2012 on equipment dating from the 1950's. His run, in which he
had trouble just making it down the icy course, has tens of thousands of views on
Youtube.2
Lastly, the laces of these boots made it difficult to get them tight enough to provide the needed control. It is a characteristic of laces to lose their tension both when the knot is tied and as it tightens and stretches, allowing the skier's foot to move too much within the boot. The next change in ski boots sought to fix this problem.
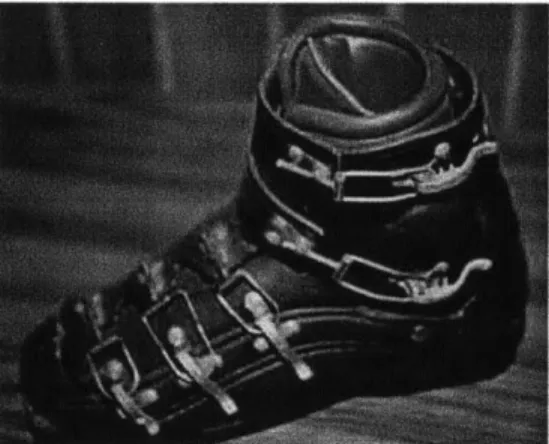
In the early 1960's, ski boots were still made of leather, but were enclosed using buckles instead of laces. An example of this can be seen in Figure 3.
Figure 3: A ski boot made by the company Reiker featuring buckles to clamp the boot on the foot.3
2 Image Courtesy of www.UnofficialNetworks.com
The buckles solved the problem of the laces being too loose, but the boot was still low cut and too soft. In addition, by this point ski bindings were also improving, and the sole of the boot
needed to be stiffer in order to better attach to these bindings.
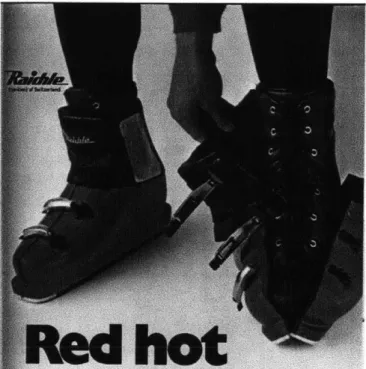
The next step in the evolution of ski boots featured plastic over the leather. Some of the important ski boot manufacturers at the time were Heschung, Henke, and Raichle. An advertisement for the Raichle "Red hot" boot can be seen in Figure 4.
Figure 4: An ad for the Raichie "Red hot" boot that featured hard plastic around the foot with stiff leather providing the flex. These boots first appeared in 1968.4
The plastic in the boot allowed it to be stiffer than previous models. However, there were still
several problems with them. They had some comfort issues, mostly involving pressure points in the shin when the skier pushed forward, a common motion while skiing. In addition, they were still lower cut than later boots.
The softness problem was commonly solved by users modifying their own boots to add stiffness, especially in the back. Skiers often put homemade "jet sticks" in the back of their
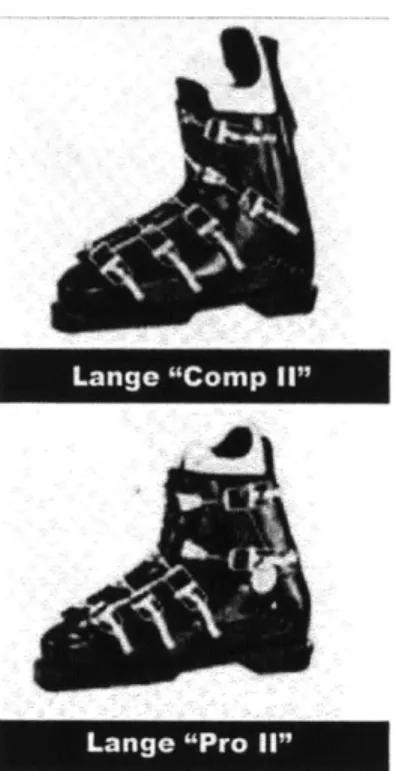
boots, made of fiberglass or glue covered tongue depressors. Lange boots were the first to
capture on this trend with the Comp I and the Pro 11, both of which are shown in Figure 5.
Lange "Comp 11
Lage"Po S
Figure 5: Lange Comp I and Pro Ii, with the Pro being one of the first boots to be cut
higher above the ankle, were released for the 1971/1972 ski season.5
These boots were some of the first to offer a hard outer shell and a full height build, which provided the best control of any boot seen to that date.
Around the same time, several boot manufacturers were focusing on creating a more comfortable ski boot. One of the most notable examples of this focus was Lange's Flo boot. Released in 1970, the Flo boot featured a new technology that was supposed to mold to the shape of the foot inside the boot. However, it performed badly in cold temperatures and often cracked, resulting in a recall of the boot and Lange having to file for bankruptcy before being sold.
One of the more popular designs in the mid 70's and through the 80's was the rear-entry boot. Designed to be easier to put on and take off, the rear-rear-entry boot featured a back section that could rotate open for easy entry in the boot. A few examples of this style are shown in Figure 6.
s Image Courtesy of Lange Ski Boots Blog:
Figure 6: A few examples of rear entry boots from the 1970's. These had better comfort, but significantly worse performance.
The rear-entry design added extra comfort with a roomier fit, but because the front part of the foot area was a solid piece, they allowed for too much movement of the foot within the boot, which detracted significantly from their performance. They were quickly shunned by the racing community, with recreational skiers following suit in the 1990's.
By the early 1980's ski boots had reached a design that is strikingly similar to modern ski
boots. This can be seen in the Lange XL-R, which can be seen in Figure 7.
Figure 7: Released in 1982, the Lange XL-R is very similar to modern ski boots.7
Surprisingly, not much has changed in the ski boot industry since the 1980's. While the materials and manufacturing processes have gotten better as well as the fit of the boot to the
6 Image Courtesy of KillingtonZone: http://www.killingtonzone.com/forums/iewtopic.php?f=1&t=2870&start=15 7 Image Courtesy of EpicSki: http://www.epicski.com/t/108716/need-self-taken-images-of-lange-boots
average foot, the overall design has stayed relatively similar, especially when considering the vast and quick changes made before this time, as well as the huge changes in ski and binding designs made since the 1980's. A modern boot, released for the 2012/13 season can be seen in Figure 8.
Figure 8: A modern ski boot made specifically for racing by Tecnica. The only visible difference between this and the Lange XL-R from 1982 is the strap around the top of the
boot.8
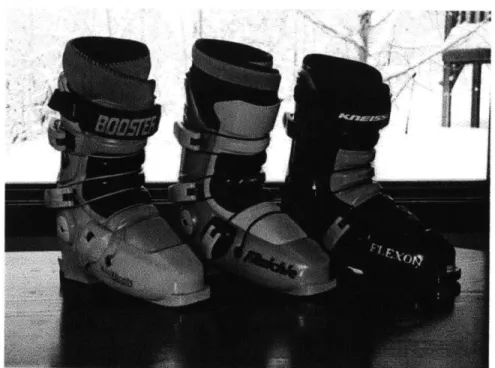
The lack of change can especially be seen today in the Raichle three piece boots. This revolutionary boot design by Raichle was first put out in 1980 and was skied by several professional racers, including Olympic gold medalist Bill Johnson. Today, almost the exact same boot is made by a company named Full Tilt, who bought the original molds. They are extremely popular even today, especially among freestyle skiers (as well as a much older Bill Johnson, who still skis on them). The original Raichle and the newer Full Tilt, as well as an interim model made by Kneissl, can be seen in Figure 9.
Figure 9: Modern Full tilt boot juxtaposed with the much older Raichle model,
showcasing the lack of change in ski boot design in the last 30 years.9
1.2 Motivation
Ski boot designs suffer from two important problems, one having to do with comfort and the other with performance. Because the structure of the boot is in the form of a hard plastic shell around a softer liner, any forces that need to be transferred from the ski to the leg or vice versa must first go through the soft, compactable liner. This allows for a delay between when the force is applied to the boot and when it is transferred to the ski, which also happens in reverse. As a result, when a skier applies pressure to the front of the boot, it is not immediately transferred to the ski. In the other direction, when the skiers skis over rough terrain, the ski will be able to wobble and shake some before the skier is able to use their leg to stop it. Each of these ski movements causes the skier to lose some control.
However, the only way to solve the problem of the loose fit is to make the liner thinner, which can be seen in the difference between and "plug" and regular race boots. A plug boot features a thinner liner with a thicker shell. While this does allow the shell to be more customized by grinding away excess plastic, it also causes its own set of problems. Namely,
having a thinner liner means less insulation. Also, to add an even closer fit many skiers buckle their boots as tight as possible, which also packs out the insulation and creates the infamous
reputation of ski boots being extremely cold and causing numerous cases of frost bitten toes.
This presents the problem that has plagued ski boots since the inception of hard boots: it's impossible to have comfort and warmth with strong performance. Tighter boots have increased performance, but lower comfort and warmth. This trend can be seen in past failed boot designs, especially the Lange-flo and the rear entry boots of the 70's and 80's. Both sought to increase comfort, and while rear-entry boots may have stayed around longer they still eventually were phased out and are no longer made. The problem of making a comfortable, warm boot that also performs at the highest level has eluded ski boot manufacturers for decades. This thesis seeks to solve this problem by designing a ski boot that is both comfortable and holds the ski more tightly to the skier than any previous boot.
2. Design - "Endoskeleton"
This thesis presents an "endoskeleton" design for a ski boot, first thought of by Dr. John Pier2, with the main structure of the boot in the form of a skeleton on the inside of the insulation. The skeleton would grip the foot tightly in such a way as to only hold the foot in places where it is more comfortable for the skier. In this way, the insulation for the boot would be able to be on the outside of the main structure.
2.1 Endoskeleton Structure
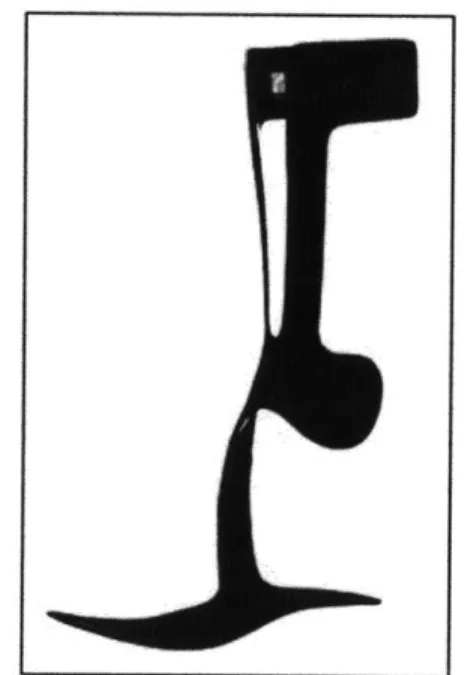
With a design based on a Carbon Fiber Ankle-foot Orthosis (AFO), seen in Figure 10 below, the skeletal structure of the boot would be right against the skier's leg and foot, with only a small layer of foam between.
Figure 10: A carbon fiber AFO, which functions to help control the ankle in patients who
would be otherwise unable to do this effectively.10
Because a skeletal structure is able to hold the skier tighter than traditional boots, it would not suffer from the same performance draw backs. Any force applied by the skier would be immediately applied to the ski, thereby increasing the control the skier has over the ski.
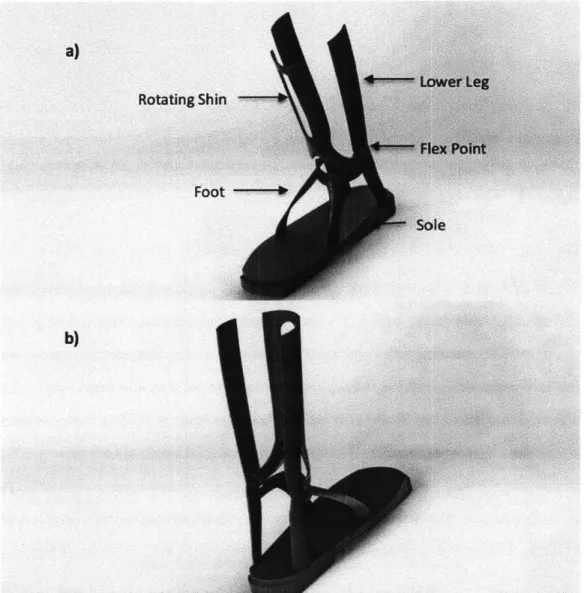
In addition, because of the skeletal design of the boot, the insulation would not get packed out and can be thicker than in traditional boots. This design allows the boot to only hold the skier tightly in certain sports, such as on either side of the lower leg. Both comfort and warmth will be improved, which are attributes that many recreational skiers consider to be more important than performance. The structure of the endoskeleton, with the sections labeled, is seen in Figure 11 below.
Figure 11: The final design is shown here from the front in a) and the rear in b). The
upper enclosure is not included in this model. The sections of the skeleton are also labeled in a).
2.1.1 Sole
The sole of the boot would be similar to that of traditional boots, made in a similar shape out the same polyurethane plastic, and can be seen in Figure 12.
Figure 12: The sole of this new ski boot design would be similar to that of traditional ski boots.
The traditional design of the sole will allow the users to keep the same binding they were already using, and will allow for the same low friction slide across the binding as it releases. In
addition it will have the same stiffness as regular boots as well as the same ability to change the
cant (side to side angle) and lift (height from bottom of boot to bottom of heel) of the boot. Lastly, it would be able to be injection molded, with the fortunate property of only needed one mold per size instead of one mold per size and stiffness. The sole section of the boot provides a base for the more structural aspects of the boot.
2.1.2 Foot
Four vertical or angled "beams" and one rounded cross beam make up the structure
Figure 13: The sole and lower structure of the endoskeleton can be seen in this
Solidworks render.
One of the biggest problems with ski boots, as well as hockey skates, roller blades, and anything else that tries to grip the foot tightly, is that feet are extremely flexible. When a person stands on their feet, the widest section of the foot expands significantly. If the ski boot were to be built to allow the foot to expand as it naturally does, it would have too much play and could easily move side to side within the boot as it expands and contracts. Modern boots solve the flexibility problem by constricting the foot from expanding and as a result often cause discomfort and even pain, especially in skiers with wider feet.
The endoskeleton design, on the other hand, solves this problem by gripping the foot with strong, structural beams only at the parts of the foot that are less flexible. It holds the foot at the heel and the mid-section, just behind the widest part of the foot, as can be seen in Figure
13 above, which are areas that expand significantly less, and can therefore be held with the
same performance as when the foot is constricted in traditional boots. With this design, the wider section of the boot is left to only be encased by the insulation, which is similar to a hiking boot and will be explained in Section 3.1. A skeletal design will improve the comfort of the boot significantly, while maintaining or possibly improving performance since the boot will still be held tightly to the foot.
Lastly, because the lower section of the boot described here encases the foot closely with many, structural beams, it is kept from flexing and deforming significantly while skiing, restricting the flex to the location where the ankle flexes.
2.1.3 Flex Point
Above the foot section is the area next to the ankle's flexion point, which is the thinnest section of the endoskeleton consisting of only two side beams. A circular area underneath the flexion point is cut out of the cross beam in the foot section. This is shown in Figure 14.
Figure 14: The flex point of the boot is shown here in gray, as well as the circular cut out in the crossbeam underneath it. This is the thinnest section of the boot, making it the
location of most of the flex the boot experiences.
Current boot designs flex more continually throughout the boot, which can cause some discrepancies between the shape of the boot in relation to the foot and ankle when flexed and when not flexed. This is caused by the way the ankle flexes as compared to the boot. The ankle only flexes at one point while the boot flexes continually. In the new design, the thinnest section of the boot is in the area near the where the ankle flexes. In addition, the crossbeam underneath this is also cut thinner. These two attributes work to keep the flex concentrated in this area, which matches the natural flex of the skier's ankle.
Another problem with the way traditional boots flex is that the boot deforms as it flexes. For instance, the lower section encasing the foot is widened when the boot is flexed. The boot then releases some of its grip on the foot when it is pressured, which is exactly the
opposite of what is desired. Race boots counteract this problem by making the lower section of the boot especially tight, which causes comfort problems. Because the location of the flex in the skeletal design is concentrated to only one location, the lower section of the boot sees
significantly less displacement, as mentioned in the section above.
In addition, when traditional boots are flexed, the front part of the boot that presses against the shin must slide slightly along that section of the leg. This is caused by the physical nature of the flex of the boot, and causes problems for many male skiers. As the shin, a high pressure section of the boot, slides along the leg, it can grab the hair on the leg and pull it slightly. It's not uncommon for male racers, who are both in their ski boots for extended periods of time and put great amounts of pressure on the front of the boot, to shave their lower legs. However, because the shin part of this new boot, which is described below in section 2.2, moves fluidly with the rest of the lower leg, this discomfort is significantly reduced.
Lastly, as a result of the flex being one of the more important attributes of a ski boot, many different models are made for each size and type of boot. For traditional boots, these different models are made by changing the thickness of the plastic which changes the flex, resulting in different molds being needed for each size and flex. Because the flex of this new boot is isolated to one component, the only section that would need to be changed to adjust the flex is this middle section. The rest of the structure could stay constant for different models of the boot, which would ease the manufacturing of the boot. It could also be made of a different material from the rest of the boot with different elastic properties to change the level to which the boot flexes.
2.1.4 Lower Leg
Above the flex point are two main sections, the skeletal part and the rotating front, which is described in detail in section 2.2. The boot in this section is made up of two thick beams that run up the side of the lower leg, following the contour of the leg, to a height similar to that of a modern, traditional ski boot, as can be seen in Figure 15.
Figure 15: Section of the boot next to the lower leg and above the flex point consists of two wide beams that transmit the force from the skier to the boot.
The beams section of the boot is wider than the flex point, keeping it from bending significantly
when pressure is applied to the shin. This is important as the lower part of the leg cannot flex
on its own either. It is also shaped to fit the leg of the skier, increasing the comfort of the boot.
The most critical property of this part of the skeleton is its ability to transmit the force
applied to the boot through to the ski. Carbon fiber was chosen as it is well known to have good properties for this task, which is described further in Section 4.2. Force Transmission includes both forces applied forward and backward as well as lateral forces. These structural beams are closer to the skier's leg without any insulation between them and the leg allowing for better control of these lateral forces. The improved control is enabled by the forces being
immediately transferred from the skier to the ski and vice versa, without getting absorbed by
insulation. The forward directional forces are transferred to this section of the boot from a rotating shin section through a buckle.
2.2 Rotating Shin Support
The front part of the structure of the boot consists of a freely rotating piece, similar to the tongue of a hiking boot, but made out of a stiffer material. Like the rest of the boot, the front structure is shaped to the shin of the skier, allowing it to fit closely needing only a thin
layer of foam between it and the skier. The shape of the shin support is shown in Figure 16 below.
Figure 16: The front part of the boot is shaped to the shin and would fit comfortably even close to the leg.
The shin support does not need to handle the same stress as the more structural parts of the boot and can therefore be injection molded using traditional plastics This would save time and cost while manufacturing the boot.
The shin part is connected to the rest of the boot via a rotating connection, which would be located next to the ankle's flexion point. In this way, it would be able to rotate in a way that
follows the natural flexion of the ankle. The connection, shown in Figure 17, would attach the shin piece at the end of the two arms that extend down and to the sides, and would be made of a different material from the flex point in order to affect the flex in as minimal a way as
possible.
Figure 17: The connection for the rotating shin piece is shown here in red. It will allow the shin piece to rotate at the same location as where the ankle flexes.
Lastly, the shin part would be held at one rotation relative to the side support beams via a buckle system similar to that seen in snow board boots and roller blades, which would allow for a strong, firm connection that would keep the piece from moving relative to the two beams on either side of the leg while still being able to set it at a certain length. In addition, it could be opened easily on chairlifts or when walking around to increase the comfort of the wearer when they are not actively skiing. See Figure 18 for an example of this type of buckle.
Figure 18: The buckle system found on many snowboard bindings, such as this K2 model, would also be used to hold the shin piece in place."
2.2.1 Force Transfer
The force applied to the front of a ski boot is one of the most important forces used in skiing as it is the force that pushes the tip of the ski into the snow, allowing it to grip closely and, in the case of shaped skis, carve cleanly. Therefore, it is important that this forward force is not dampened or absorbed at all. However, in a traditional ski boot the force is dampened considerably by the tongue of the liner.
To make sure all forces are transferred directly from the boot to the ski (or from the ski to the boot), the rotating shin part must be especially close to the leg, with minimal foam
between the boot and the shin. In order to do this, the part must be shaped as closely to the shin as possible. To help improve comfort, a gap in the middle of the part was created, which helps keep any pressure points from becoming an issue (see Figure 16). Pressure points on the
shin are often a problem in traditional boots because of the way that the boot flexes differently from the ankle, which means the pressure applied to the front of the boot is only applied at one location. This can cause bruising and discomfort to skiers who ski often and for long periods of time. However, bruising is not a problem with this new boot design because the front of the boot contacts the entire shin equally and evenly, preventing any specific points from taking on too much of the forward force.
The closeness of the skeleton also contributes to the way all forces are immediately exchanged from the shin piece to the upright support beams and on through the flex point and lower structure to the boot. A moment will actually be created around the bottom of the boot, pushing the toe of the boot down, as is illustrated in Figure 19 below.
Figure 19: When the skier applies a force to the shin (orange arrow), it is transferred by the buckle (not shown) to the two support beams (black arrow) and through the lower
structure (green arrow). This results in a moment around the sole of the boot (blue arrows) pushing the toe of the boot downward.
2.2.2 Forward Leon
The shin part also controls another important aspect of the boot, the forward lean (the angle at which the boot leans forward). This forward lean changes between different boot models and is important because it affects the moment shown in Figure 19. For instance, race boots have greater forward lean than recreational boots because racers generally want more force to be applied to the tip of the ski. Even between skiers in the same boot, varying degrees of forward lean are often wanted, with some people desiring more than others depending on their style of skiing.
In traditional ski boots, the forward lean is set via plastic wedges called "spoilers" placed in the back of the boot behind the calf muscle. However, boots generally only come with one size of spoiler, which can either be left in or taken out. If a skier desires to change the forward lean by a different amount, they are forced to mix and match spoilers from different manufacturers or find some other material to put behind the liner of the boot. Also, because the size of a person's calf changes significantly depending on body size and shape, the forward lean of the boot can change when it is worn by different skiers.
By using the front of the leg to set the forward lean instead of the back, the angle is set by the shin. Unlike the calf, most people's shins are relatively uniform as the shin muscle
doesn't change nearly as much in shape. In addition, by setting the buckle system seen in Figure 18 to different lengths, the forward lean can be set easily and accurately to many different settings. Figure 20 a) and b) display how the front shin part can rotate to set' the forward lean.
Figure 20: Exaggerated differences in possible forward lean settings can be seen here, with Figure a) showing a lower forward lean than in Figure b). This forward lean would
3. Enclosure and Fit
The design up to this point still leaves the foot and leg open to the elements and does not close off the back of the boot. However because the design is a skeleton, there is more room for insulation around the foot and leg, which is covered by an enclosure. The parts for the enclosure are labeled in Figure 21.
Figure 21: The boot with the parts of the enclosure labeled.
3.1 Foot
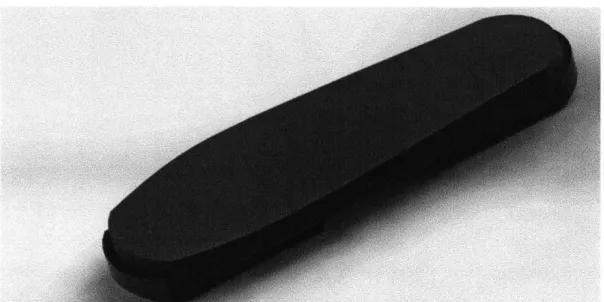
The foot area would be enclosed similar to a hiking or snowboard boot, with stiff materials and thick insulation. The insulation and covering would go on the outside of the supports shown in Figure 13. Because there is no hard plastic shell on the outside of the insulation, there is more space for thicker insulation. In order to better protect the foot, the encasing would still have to be relatively stiff, resembling a heavy duty mountaineering boot, such as the one shown in Figure 22 below.
Figure 22: The lower section of the boot around the foot would resemble that of a thick
hiking boot, such as the model shown here, which was made by Scarpa.12
In order to have the desired amount of control, the lower section of the boot would have to be able to be easily and tightly closed around the foot. While this is less important than in a traditional ski boot since the endoskeleton will grip the foot on its own, it will still improve the overall performance of the boot. It will also pull the two diagonal support beams of the lower structure of the endoskeleton closer together in order to better grip the foot.
There are a few possible ways to tighten the lower section of the boot. First, buckles could be used similar to traditional ski boots. However, this is difficult to do without having a hard outer shell and only pulls the boot together at the point where the buckle is. Laces are another option, but are difficult to get tight enough and have a tendency to loosen as they are worn. However, there is a company named Boa Technology3 that produces a new type of laces
called the "Boa Closure System" that are rapidly growing in popularity. The Boa system first gained popularity for use in snowboard boots, but have since been implemented in everything from golf shoes to hiking shoes, and even in medical braces, backpacks, and helmets.
The lacing system features strong steel laces with nylon guides that allow the steel to slide easily and evenly over it, which allows for a more even closure by lowering the friction as
the laces slide through the lace loops. Normal laces see a great deal of friction as they are tightened, as governed by the capstan equation, which prevents this even closure. The Boa system also allows for easier and quicker tightening by using a mechanical reel at the end of the laces. An example of this reel and the Boa system is shown in Figure 23 below. The system would be used to tighten the lower section of the boot around the foot (see Figure 21).
Figure 23: The Boa lacing system is seen here as the laces of this hiking boot. When the wheel is turned, the steel laces are tightened smoothly, closing the boot for a better fit
than with traditional laces."
As the reel is spun, it tightens the laces, creating an easy way to tighten the boot around the foot more quickly than tying a knot. The Boa system also has two other added benefits. First, it is possible to tighten the laces tighter than with traditional laces by using a combination of the reel and wires. Boa even offers a "High Power Reel," which is the one used in snowboard boots. Second, it can be rapidly loosened by simply pressing a button on the reel, which causes the wire to be released and the laces to rapidly loosen. This is beneficial if the skier wants to loosen the boot on lift rides, when taking a break from skiing, or when hiking. For these reasons, the Boa Closure System was chosen as the best solution for how to secure the foot in the lower section of the boot.
1 Image Courtesy of Trout Underground:
3.2 Rear Enclosure
The rear of the boot will be held by two straps, one just above the heel and the other at the top of the boot. In this way, the foot and leg will be pushed forward and secured into the boot.
3.2.1 Heel Strap
The heel will be held in with a strap and buckle, which will be like a smaller version of the buckle and strap seen above in Figure 18; Its location on the boot is shown in Figure 24
below.
Figure 24: The foot will be pushed forward by a strap along the top of the back of the heel. As can be seen here, this strap would be on the outside of the enclosure.
The heel strap would be located on the outside of the enclosure instead of inside because force does not need to be carried through this section of the boot in the same way that it does through the more structural sections. The main purpose of the heel strap is to hold the foot firmly in place in the structural part of the boot.
Having a strap around the back of the heel improves on the traditional design in two specific ways. First, it allows the heel cup of the boot to be adjusted. Regular boots have a pre-set heel space that cannot be adjusted, which is a particular problem for skiers with narrower heels as the heel can lift up under pressure and be slammed into the back of the boot, causing bruises and bone spurs. Many skiers end up with an extra, bony bump on the back of their heels that lasts for years. Because the heel area is adjustable via the heel strap in this design, bone spurs on the heel will no longer be a problem.
The second problem that is addressed by the heel strap is the difficulty in putting ski boots on. Traditional ski boots feature a hard plastic shell around the softer liner. The shell overlaps in the front, which must be pulled apart in order to get the boot. For many people, the process of getting their feet into and out of ski boots is annoying, difficult, and often quite painful. This issue is exasperated when the boot is cold, such as when returning from skiing or after a car ride when the boots were left in the back of the car or truck. Many skiers leave their boots in front of heaters in order to ease the process of getting them on, but that often takes extra time and a strong enough heater is not always available. It's actually not at all uncommon for people to choose their ski boots based on the ease of getting them on.
However, because the heel strap can be loosened in this boot, it will be significantly easier to put on. Similar to the way women's high top boots often feature a short zipper in the heel area in order to take them off or put them on, this boot would be able to expand the heel area to get the boot on. The combination of this and being able to rotate the front shin piece forward will make this boot easy to put on and take off in any temperature.
3.2.2 Upper Strap
In addition to the lower strap around the heel, another strap is located at the top of the boot holding the lower leg against the shin piece. The placement of this strap is visible in Figure
25.
Figure 25: The top strap holds the lower leg firmly against the shin piece and would go inside the enclosure, which is not shown in this model.
The upper strap enables forces to be transferred from skier to ski. Similar to pressing forward, skiers often exert pressure backwards as well. For this reason, the top strap has to be close to the calf to be able to immediately transmit the force to the upright structural beams. The strap will be integrated into the enclosure around it, and it must also be able to accommodate several different sizes of calf muscles and be able to change depending on how the wearer has set the forward lean.
3.3 Upper Enclosure
The lower leg would also be wrapped in insulation although this section does not require the stiffness and protection that the area around the foot requires. For this reason, it can be made out of a softer material more similar to neoprene, which is warm, can be made to be waterproof, and is easily stretched and shaped. This makes it an easy choice for this boot. The only difficult part is making it able to stretch as the front part is rotated forward the two back straps are released when the boot is being taken off or put on. To accomplish this, there will need to be some much thinner sections that will fold inwards when the boot is fixed tightly around the leg, and stretch out when the enclosure needs to be loosened.
4. Analysis
In order to test the boot's performance under stress, a finite element analysis (FEA) was performed on the endoskeleton design using the FEA feature within Solidworks.
4.1 Verifying Stress Concentrations and Deformation of the Boot
One of the goals of the endoskeleton design was to limit most of the flex of the boot to one location. This was done by putting only two structural beams at that location and making it the thinnest section of the boot. An FEA model of the boot that lacked the straps and rotating shin piece connections was made in order to be tested within Solidworks. In addition, a round beam was added to make sure the two sides of the upright beams acted together, as they would if they were clamped to a leg. The base of the boot was held as a fixture and treated as solid and a force was applied normal to the two upright beams in a forward direction. Figure 26 shows the stress concentrations in the skeleton, which were confirmed to be mostly at the location near the ankle's flexion point, as it was designed to be.
Figure 26: When the boot was loaded in Solidworks' FEA feature, the stress was shown
The second important aspect of the boot that needed to be tested was how it deformed when a force was applied. As mentioned before, traditional ski boots deform in ways that aren't desirable. This boot sought to change the deformation pattern by keeping the flex to one location. Figure 27 shows the relative displacements of the boot under the same conditions as in Figure 26.
Figure 27: The relative displacements of the boot to a forward force on the upright beams are shown here.
The lower part of the structure doesn't deform significantly when the boot flexes. One featured added late in the design was the way the boot flexes slightly to the inside, which was at first done on accident, as shown in Figure 27 with one structural beam deforming about a
millimeter more than the other. Although it was minimized, this is actually favorable in a ski boot since it will encourage greater pressure on the tip of the ski.
4.2 Flexion and Material
In order to determine the appropriate amount of flex needed, first the force applied to a boot during regular skiing must be found. A study conducted in 19804 measured the moment at the sole of the boot, as illustrated in Figure 19, to be used to evaluate bindings at the time. Their findings can be seen in Figure 28.
z 40 - RUN z20-I I I I I 3 4 5 6 7 8 9 TIME, sec.
Sample leg torsion history recorded at the boot sole during recreational skIing
Figure 28: The moment measured at the boot sole, with a max around 40Nm, can be
converted into a force applied to the shin, which correlates to around 145N.
The moment around the boot sole, with a maximum around 40Nm, correlates to about 145N of forwards force, depending on the exact height of the boot. Next, the amount of flex required was found by flexing a pair of Tecnica racing boots, the same model as the boot in Figure 8, and using a pair of calipers to measure the displacement. It was found that a force of 145N should achieve a flex of a little more than 4mm.
After these numbers were found, the boot was tested in Solidworks FEA software. It was found that plastic was not nearly strong enough, which was expected based on the thinner support of the skeleton boot as opposed to a traditional boot. The displacement of the plastic boot is shown in Figure 29.
-20
4A -A
A A ft/
A/Alu
-,d&L 1W VV-7
'%4tS(m)
- 2le.002
Figure 29: The displacements were significantly too large with a PE High Density Plastic
as the material, with the maximum deformation close to 30mm.
Since traditional ski boot plastic does not meet the deflection requirements, another material had to be selected. Because of its extremely high strength and low weight, carbon fiber was chosen. Due to the nonlinear and anisotropic properties of the weave used to make carbon fiber, the properties of the material change depending on which direction the forces are applied. Solidworks can be used to approximate the behavior of carbon fiber components in low deflection applications. In the Solidworks model, the carbon fiber material was approximated by manually entering mechanical properties for carbon fiber, in this case an elastic modulus of 70 GPa5. The widths of the support beams were adjusted until the applied
load matched the desired deflection. This final test can be seen in Figure 30.
Figure 30: The displacements of the boot made of carbon fiber were used to adjust the widths of the support beams until the correct flex was achieved.
5. Next Steps and Further Potential
The work presented in this thesis represents only the first conceptual studies of the endoskeleton concept for a ski boot. There are still a number of design phases to be completed.
5.1 Extended Analysis and Prototyping
A more in depth analysis should be done using a program specifically designed for FEA
of complicated structures. A couple examples of such programs are Abaqus and ANSYS. These programs have built in features that would be able to account for the nonlinear nature of the carbon fiber. In addition, further analysis of the flex point and other possible materials should be conducted within the FEA software. It would be possible to make this flex point out of a different material than the rest of the skeletal structure.
In order to more fully analyze the boot, the forces and desired flex would need to be confirmed for multiple forces. This would require either getting the data directly from one of the manufacturers, which would be difficult considering this new boot design would be in competition with their own designs, or building a mechanical testing jig that could apply a force and measure the resulting displacement. Such devices have been made, but the data is not widely available.
When the analysis is finalized a prototype can be built, which will need to be tested in the lab and refined before a fully functional model can be tested on snow. The functional model would again be refined after on-slope testing before final testing could begin. After that, it needs to be designed for manufacturing, then built and released.
5.3 Injury Prevention
Ski boot manufacturers have yet to make significant design changes to their boots in order to encourage injury prevention. The design of this boot is ideal for adding features that would increase injury prevention. The greatest of which would be allowing a break point in the
flex of the boot that would allow it to suddenly flex backward freely. This feature could be added in to the upright columns on either side of the boot using materials for which the yield strength is well known. For instance, the structural beams on either side of the leg could have a break that is held by a machined rod. This rod would break when a certain amount of force, the force required to tear a ligament, is applied. This rod would have different thickness and characteristics depending on the skier's strength and size. Allowing free flexion backwards would help to prevent certain types of knee injuries which occur when a forward force is applied to the knee, such as when a ski is loaded with pressure and releases upward suddenly when the skier is already off balance.
6. Conclusion
Boots evolved quickly from the 1950's through the 1970's, but have seen little change since then. All the design changes during this time were attempting to improve comfort and performance, but no design managed to be both comfortable and have strong performance. Using an endoskeleton design, a new boot design seeks to solve this problem. By gripping the foot closely with minimal padding, high performance is achieved. By shaping the boot exactly to the foot and using a skeletal design that leaves extra room for insulation, comfort is also achieved. The boot would hold the foot through a series of straps and Boa laces, and would only flex at one location, similar to an ankle. In order to accomplish this, plastic could no longer be used and carbon fiber was tested as the replacement.
References
[1] Background information from David Pier (personal communication, May 4 t, 2013)
[2] Endoskeleton idea credited to John Pier (personal communication, Feb 24th, 2013)
[3] Boa Technology, http://www.boatechnology.com/
[4] Lieu, D. K., and C. D. Mote, Jr. "An Electronic Ski Binding Design with Biofeedback." Journal
of Mechanical Design 102.4 (1980): 678.
[5] "Mechanical Properties of Carbon Fibre Composite Materials, Fibre / Epoxy Resin (120*C
Cure)." Mechanical Properties of Carbon Fibre Composite Materials. Performance Composite, Ltd., n.d. Web. 15 Apr. 2013.