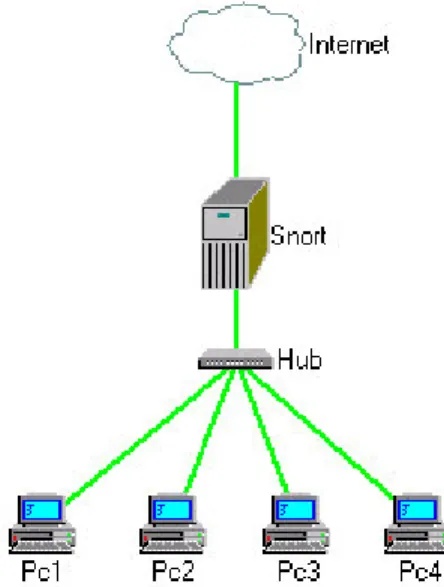
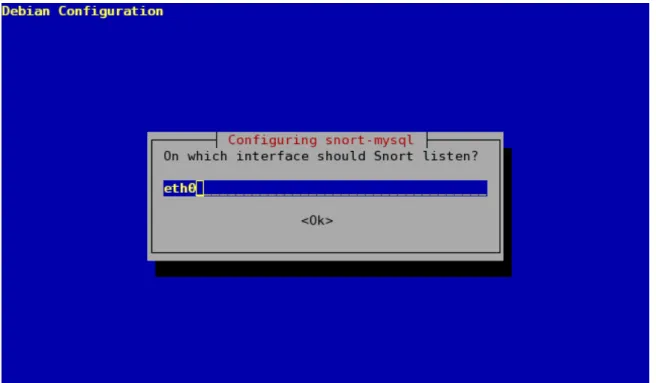
Securing your network with snort intrusion detection
Texte intégral
Figure


Documents relatifs
Application A1 on host H1 and application A2 on host H2 first get in contact using the standard IP over ATM to exchange their ATM address (atm1, atm2) and to define a
Once this constraint is lifted by the deployment of IPv6, and in the absence of a scalable routing strategy, the rapid DFZ RIB size growth problem today can potentially
Potential action items for the W3C included investigating the formation of a privacy interest group and formulating guidance about fingerprinting, referrer headers,
The first was that the Internet Architecture Board should review and consider that document in the context of evaluating Birds of a Feather (BoF) session proposals at the
When talking about users, we also need to distinguish the end user (who we typically think about when we talk about UI) from the server administrators and other technical
This CA certificate will be the issuer of the BPKI EE certificates corresponding to private keys that the child will use when sending provisioning protocol messages to
[AllJoynExplorer] can be used to browse and interact with any resource exposed by an AllJoyn device, including both standard and vendor-defined data models, by retrieving
My government has made repeated efforts to bring employees and employers to the bargaining table to reach a mutual agreement. However, neither the employers nor the employees have
