Design of an Adaptable, Protective Covering for Precision Experiments by
Shannon Turner
SUBMITTED TO THE DEPARTMENT OF MECHANICAL ENGINEERING IN PARTIAL FULFILLMENT OF THE REQUIREMENTS FOR THE DEGREE OF
BACHELOR OF SCIENCE IN MECHANICAL ENGINEERING AT THE
MASSACHUSETTS INSTITUTE OF TECHNOLOGY JUNE 2006
© 2006 Massachusetts Institute of Technology All rights reserved
Signature of Author:
,_,_.,
~
,-.,...
..
-. -.- --...
-/
_-
...
"
/0
A, //
Department of Mechanical
Engineering
May 12, 2006
Certified
C ertified by:by:
/
.,.>..<*K.; .... ....
.......
~/y~~~~~ ~ ~~~Martin L. Culpepper
/Rokwell ernational Assistant Professor of Mechanical Engineering Thesis Supervisor Accepted by: ...
-'"" .. John H. Lienhard V
Chairman of the Undergraduate Thesis Committee
MASSACHUSETTS INS]
Design of an Adaptable, Protective Covering for Precision Experiments
by
Shannon Turner
Submitted to the Department of Mechanical Engineering on May 12, 2006 in Partial Fulfillment of the
Requirements for the Degree of Bachelor of Science in Mechanical Engineering
ABSTRACT
The following work provides the necessary details to assemble an adaptable enclosure device to protect precision experiments from the influence of outside factors. Through the use of UV resistant, sound resistant, electric resistant acrylic the enclosure provides a simple means of guaranteeing better data acquisition without the requirement of complex protective mechanisms. The acrylic material used for the design resists UV wavelengths up to 500 nm. The design is also dependant on its adaptability and the ease of manufacturing and use. By machining 14 acrylic sheets and applying magnetic strips to the edges, as well as cutting 12 steel beams, 7 different enclosure sizes can be assemble. There is one smaller box that is 6 inches in height, 4 that are 12 inches in height and a wide variety of widths and lengths, and two that are 18 inches in height. Because of the design they can also be changed to a new size any point. The enclosure improves the performance of testing on the nanometer level because small influences on the experiment can greatly affect the data collected. This device protects the experiment and the integrity of the data and improves the values recorded by 40%. The report details the necessary materials, the machining process and the assembly required to create this enclosure device.
Thesis Supervisor: Martin L. Culpepper III
TABLE OF CONTENTS ABSTRACT ... 3 LIST OF FIGURES ... ...6 LIST OF TABLES ... ...8 LIST OF TABLES ...8 1 INTRODUCTION ...11
2 Design Requirements for Enclosure ... 13
2.1 D esign C onstraints ... 13
2.2 D esign Strategies ... 15...1
3 Design and Materials of Enclosure ... ... ... 20
3.1 Acrylite GP acrylic ... 20
3.2 90 degree steel angle ... ... ... .. ... 23
3.3 Magnetic Strip ... 24...
3.4 Rubber Foam Gasket ... 25
3.5 Plugs and Adapters ... 26
3.6 Thermocouple Sensor ... 27
4 Fabrication and Assembly of a Prototype ... 29
4.1 Fabrication Method Selection ... 29
4.1.1 Waterjet Cutt ing . ...29
4.1.2 Saw ... 31
4.1.3 Drilling .. ... .. . . .. ...31
4.2 Assembly ... 32
4.2.1 Attaching Magnets and Rubber Strips ... 32
4.2.2 Mounting the Plugs and Adapte . rs ...33
4.2.3 Mounting Tops to Steel Supports ... ... 34
4.2.4 Final Assembly ... 34
5 Performance Characterization ... 36
5.1 Modularity .. 36
LIST OF FIGURES
Figure 1.1 : Image of enclosures protecting an experiment ... 12
Figure 2.1: Original enclosure concept ... 16
Figure 2.2: Second design iteration. Frame design with screws and frame with magnetic sheets attached ... ... ... 17
Figure 2.3 : Final design. Frame design with only four supports and frame with magnetic sheets attached ... ... 17
Figure 3.1 : Light transmission curve for amber 436-4 Acrylite GP sheet with a thickness of 0.236 inches [04] ... 22
Figure 3.2: 1/8 inch thick steel angle bracket with 1 /4 inch legs and zinc-galvanized coating...24
Figure 3.3: 1/8 inch thick, 1 /2 inch wide magnetic strip with adhesive backing ... 25
Figure 3.4: 1/16 inch rubber foam gasket with adhesive backing ... 26
Figure 3.5: Standard BNC Adapter ... 26
Figure 3.6: BNC to stackable banana plug ... 27
Figure 3.7: Model J thermocouple sensor with exposed tip ... 28
Figure 4.3: Unibit used to drill holes in acrylic for BNC connector...32
Figure 4.4: Acrylic sheet with attached magnet ... 33
Figure 4.5: Acrylic sheet with attached adapters ... ... 34
Figure 4.6: Final assembly of enclosure protecting an experiment ... 35
Figure 5.1: Graphs showing the position of the experiment with and without the enclosure as noise was occurring around the system ... 37
Figure 5.2: Graphs showing the position of the experiment with and without the enclosure as noise was occurring around the system ... 38
Figure 5.3: Graphs showing the position of the experiment with and without the enclosure as noise was occurring around the system ... 38
LIST OF TABLES
Table 2.1 : Design Constraints for the Enclosure System ... 13
Table 2.2 : Pugh chart for three designs... 18
Acknowledgements
I would like to thank Professor Culpepper for allowing me to do this thesis under his guidance. He has provided me with great insight and helped me developed my design into what was finally produced. Most of all he allowed me to refresh my appreciation for engineering and design, and allowed to me to realize that I am capable of being a real engineer.
I would also like to thank Gerald Wentworth and the other staff in the LMP laboratory for their help and guidance during the manufacturing process. They are always willing to help and have a vast knowledge of the tools, and therefore provide valuable insight of what methods should be used to machine each part.
CHAPTER
1
1
INTRODUCTION
The purpose of this project is to design an enclosure for nanometer-level precision experiments. Often position data can be compromised because of the influence of outside factors. At the nanometer scale, errors of 10's to 1000's of nanometers are experienced if thermal, vibration and sound influences are not mitigated [01]. The sound waves and vibrations propagated when people speak near an experiment can alter the data, or UV light can introduce a temperature increase and affect the mechanisms [02]. This project covers the design of an enclosure system that takes into account the importance of protecting the integrity of the experiment while enabling easy access to the experiment.
By designing an adaptable module that can be used on different size experiments, rather than one particular experiment, the enclosure is useful in a laboratory where different projects are going on. In the following sections, the design will be detailed as well as the necessary materials for the enclosure system which are important for protecting the experiment from ultraviolet light, temperature fluctuations, and vibrations caused by sound pollution. It also incorporates the necessary adapters into the design to allow wiring for the measuring devices to be threaded through the box without compromising its protective properties. With the new setup
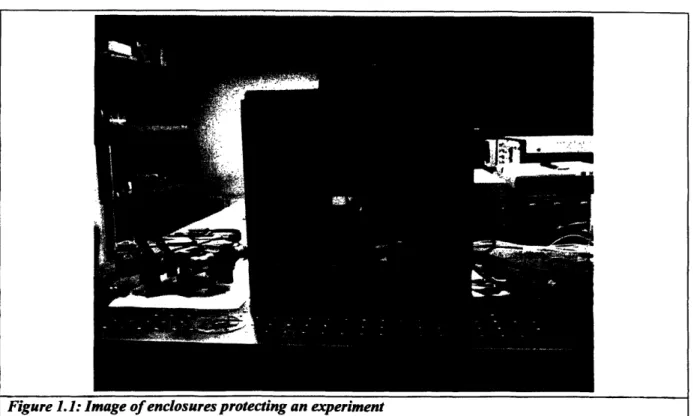
the experimental measurements will be much more accurate because many of the outside influences won't affect the system. The design can be seen in Fig. .1.
Figure 1.1: Image of enclosures protecting an experiment
Today precision experimentation is very common. From the fields of engineering to the
pure sciences, to the ever growing field of nanotechnology, precision experiments are becoming
ever more important, and even more common. Often these experiments are performed on Optical tables which damp out vibrations of the floor or the surface of the table. While large coverings for floating lab tables are available through the table provider, such as TMC, their enclosures cover the whole lab table. This introduces a problem when multiple projects are being performed on one table, or if a variety of needs are demanded. The design presented here allows for a much smaller enclosure that can be easily removed and stored, as well as adapted.
-CHAPTER 2
2 Design Requirements for Enclosure
This chapter will detail the constraints introduced for the design as well as a justification for why they are important. It will also describe the design strategies used to approach the final design.
2.1 Design Constraints
The design constraints for this project dictated how the apparatus would work to protect the experiments. They also play an important role in the overall design and the materials used. The constraints and their importance to the project are displayed in Table 2.1.
Table 2.1: Design Constraints for the Enclosure System
Constraints
Importance
UV resistant while still being transparent UV light can influence the temperature inside to visible light the enclosure. It is also important to be able to view the experiment to make sure that nothing is going wrong.
Sound resistant Sound and vibrations may cause the
Electric field resistant
Easily adapted
Location for cables to be connected
Electric fields may affect the results of the experiment.
Can be applied to a variety of experiments. They also must be able to be broken down and stored in a small area.
Data needs to be taken inside the enclosure, thus it's important to have a means to access the measurement tools through the walls.
The first three design constraints protect the quality of data taken from the experiments, which is
extremely important and easily influenced when dealing with precision experiments. Thus it is
important to take into consideration the details necessary to make sure that they are achieved. The adaptability is important because the apparatus will be used on a variety of experiments, therefore it must be able to protect a variety of experiment sizes. Also, since there isn't much
storage space in the laboratory it must be able to be broken down and stored without occupying
large amounts of space when it isn't being used. Finally, there needs to be a location where cables can be connected to the box from the inside so that data can be recorded without compromising the integrity of the enclosure.
--
2.2 Design Strategies
Different designs were considered to determine the best way to design the enclosure so that it could accommodate the design constraints a variety of ideas were tested. The first main concept that was explored utilized a design with boxes of varying sizes that could fit together to make an enclosure of varying sizes. The second concept was formed with magnets that allowed pieces to snap together to make a box onto a fully assembled frame. A third concept was derived from the second concept, but was slightly simpler, where the pieces snap onto free standing supports.
The initial design was a variety of three-walled boxes that could snap together to provide and enclosure for the experiment. After analyzing the design more in depth, it became apparent that the model wouldn't fulfill the design requirements or be the best design. The boxes wouldn't
be very adaptable because they wouldn't fit together if they were different heights, and storage
wouldn't work well because they would take up a lot of space. The original concept can be seen in Figure 2.1. Thus a second design was developed.
Design Concept 1
side Open sid
3 walled box
4 walled box
. Open slde
Open Opde id
*eOpen side
Figure 2. 1: Original enclosure concept
The second design used sheets of acrylic of varying sizes that had magnets attached to
them. There would also be a steel frame which the acrylic sheets would stick to. One side would
be permanent with a length of 18 inches and it would be 12 inches high. The other side could adapt to a variety of lengths including, 12 inches, 18 inches, 24 inches and 30 inches. This would be achieved by having different size panels that when combined could cover the new side. The frame would be adapted by removing the eight screws holding the adaptable side together and replacing it with a different length steel beam. While this design was functional and adaptable, it was slightly complicated because screws needed to be removed and replaced to adapt the
The third design arose from slight variations in the second design. Instead of having a frame that required the supports to be screwed in, the top supports were removed. The new
design only required the four corners to have a support system. Then panels could attach to those
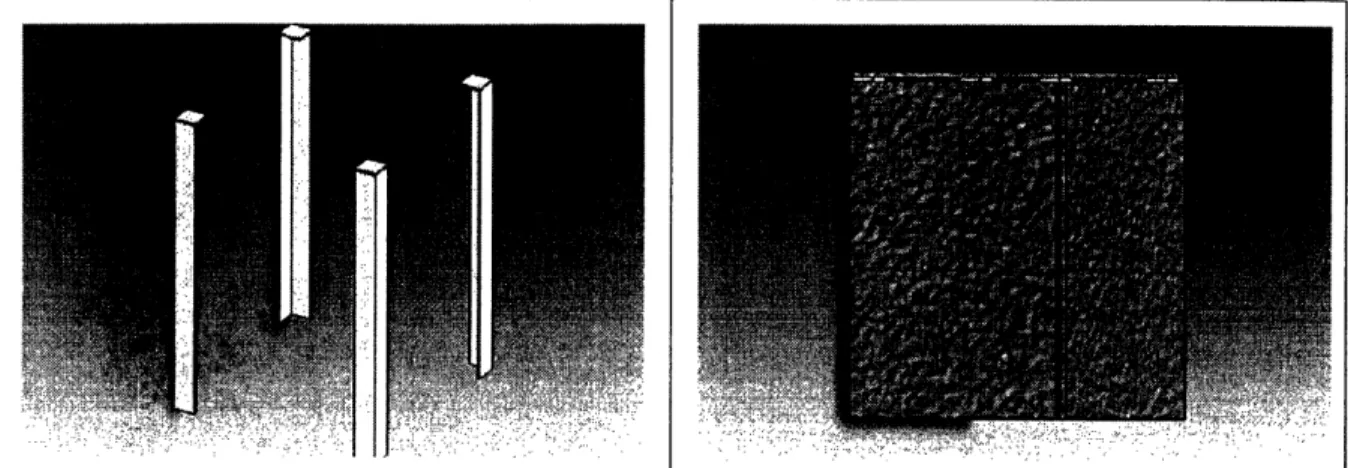
beams and provide the structure for the enclosure. The final design can be seen in Figure 2.3. Figure 2.2: Second design iteration. Frame design with screws and frame with magnetic sheets
attached
Figure 2.3: Final design. Frame design with only four supports andframe with magnetic sheets
attached
After examining the ability of each design to incorporate the design constraints, the final design that incorporated the simple supports and the panels that attached with magnets was chosen as the most ideal design. This was done with the help of a Pugh chart that compared each designs ability to fulfill the requirements. Table 2.2 details the reasoning.
The flexible design system only requires 14 panels, and 12 steel brackets. Table 2.3 details the required part dimensions.
Part Quantity Size
Acrylic Sheet 2 18" x 6"
Acrylic Sheet 3 12" x 6"
Acrylic Sheet 5 12" x 12"
Acrylic Sheet 4 18" x 12"
Steel Beam 4 6" long
Steel Beam 4 12" long
Steel Beam 4 18" long
Table 2.2: Pugh chart for three designs
Design I Design 2 Design 3
UV resistant +1 +1 +1 Sound resistant 0 +1 +1 Electricity resistant 0 +1 +1 Easily adapted -2 -1 +2 Cable attachments 0 +1 + 1 Total - 1 +3 +6
With these parts 7 different size enclosures can be created. They are: 12" x 18" x 6"
6"x 12"x 12"
6"x 18"x 12"
12"x 12"x 12"
12" x 18" x 12"12" x 6" x 18"
12" x 12" x 18"CHAPTER 3
3 Design and Materials of Enclosure
The materials used to design the enclosure are important in the functionality of the enclosure. They are detail in this section.
3.1 Acrylite GP acrylic
One of the main design constraints was to reduce the influence of UV light and sound on the experiments. Also, it was required that the material be transparent so that observations could be made while the experiment was running. After researching a variety of acrylics a decision was made to use Acrylite GP sheet because of its ability to fulfill all of the required design aspects. The Acrylite GP acrylic is produced by Cyro Industries. The GP sheet is manufactured using a cell cast process as opposed to being continuously extruded. Since it is manufactured by this means this acrylic has a variety of properties that make it better than those produced through extrusion. The GP acrylite has less of a chance of chipping or melting during machining, better chemical resistance, and accommodates mechanical loads better that the extruded counterpart. There are also a variety of physical properties that make this material ideal for the enclosure
In terms of the UV light constraint as well as the materials need to be transparent this design fulfills both needs. When researching the different types of GP sheet the one that best rejected UV transmission is the GP sheet that is tinted with Amber. Amber acrylic is often used for projects where UV protection is needs. One example is for welders, who often can be seen using an amber acrylic shield because the welding emits a large amount of UV light which can damage their eyes. The same is also true often in dentistry where a UV light is used to harden certain dental work. The dentists will use an Amber colored shield to protect their eyes. The distributor had an Amber 436-4 sheet with a thickness of 0.236 inches in stock, which was perfect for the needs of the project. While the sheet allows 92% light transmission through the
sheet so that the experiment is visible, it still blocks a 100% of the UV light that will affect the
experiment [03]. It's guaranteed that all of the GP sheets allow essentially no UV transmissions
at 320nm. The amber colored sheet blocks UV transmission up to 500 nm. Figure 3.1 shows the
CYRO Industries 0oa0 VI s 6a m5 55 0 . 45 4C 35 15 IC. 5. 3z,_ .:. . ,... _... M0 400 800 O *000
Deruipkn: GiP (olr 43i1-4 tai.2,.')
Inmlunmntl Model: I.AMBL)A 19 UVVIS'%IR
1200 1400 1C0O lo00
Scan Speed: 450.00 lr:min
Sit Width .0000 rl
Figure 3.1: Light transmission curve for amber 436-4 Acrylite GP sheet with a thickness of 0.236 inches /041
As can be seen from the curve, this specific type of acrylic allows 0% UV transmission up to 500 nm. UV radiation has a range of 1-380 nm. The lower values are considered extreme UV while the near UV range is 200-380 nm. At the near range the UV spectrum is broken down even more with UVA having wavelengths ranging from 380-315 nm, UVB 315-280 nm and UVC less then 280 nm. Our main concerns are UVA and B light since UVC is absorbed by the ozone layer.
Not only is the Acrylite GP sheet effective at resisting UV light transmission, it also
understanding sound transmission. The index details the difference in decibels from one side of the structure to the other. Thus, with the design of the enclosure it would be from the outside of the box, to the inside of the box. This value is affected by material thickness which is one of the reasons that we choose a thicker panel size. Since the panel is thick it is unable to vibrate well when sounds waves hit it, it restricts the amount of sound transmission through the material. With the acrylite material and its thickness of 0.236 inches the sound reduction is between 20 to 40 decibels depending on the level of outside noise at the time. The more noise there is the higher the sound reduction this is. This is very important because not only does sound from
people talking affect the experiments, but noise outside the laboratory such as traffic can be heard inside and cause extra vibrations in the air.
While the Acrylite GP provides a wide range of technical qualities, one final characteristic that is import to the project design is the products machinabiltiy. The product can be worked on easily with most machines. It can be used on the band saw, and also drilled without
concerns of shattering. While care should be taken to guarantee that proper coolants and tools are used, the acrylic is easy to work with. Overall, all of the qualities of this material make it ideal
for this project.
3.2 90 degree steel angle
After the enclosure design was finalized and it was decided that magnets would be used to hold the box structure together, the necessary support material was determined. 90 degree angle steel beams were chosen for the leg supports. The legs have a thickness of 1/8 inch and a length of 1 1/4 inches each. This thickness was chosen because it would provide stability and strength
because the beams provide the overall support for the system. Thus they must be able to stand on their own as well as withhold the acrylic panels. Also, having a larger leg length provides a large surface for the panel to attach to. This helps accommodate any variations in material dimensions and allows a strong magnet to be used. Finally, a Zinc-Galvanized coating was chosen to guarantee that no rusting or reactions would affect the material. The material is shown in Figure 3.2.
Figure 3.2- 1/8 inch thick steel angle bracket with I % inch legs and zinc-galvanized coating
3.3 Magnetic Strip
A flexible strip magnet was chosen as the attachment mechanism. The magnet has holding ability on one face and on the other is an adhesive backing for easy attachment to the acrylic sheets. The magnetic strip is shown in Figure 3.3. Since the steel support beams are 1 /4 inch
wide, a strip width of 1 V2 inches was chosen to guarantee full coverage and extra surface area for
attachment. This component is important because it allows the acrylic sheet to attach to the steel supports without a precise tolerance. A thickness of 1/8 inch was chosen for the magnet because the thicker magnet provides a larger holding strength. For this particular magnet the pull per linear foot is 24 lbs. This provides adequate holding power for the structure without being so
Magnetic Face
3.4 Rubber Foam Gasket
A Foam Rubber material was chosen to apply to the bottom edge of the acrylic that would be sitting on the table. This would provide extra cushioning against external vibrations. This material is also able to be applied to the edges of the acrylic to provide an extra seal that prevents the entrance of outside air and vibrations. The rubber has a thickness of 1/16 inches and width of 12 inches. Also, it recovers well from compression which is important so that it doesn't
lose its effectiveness over time. The gaskets' details can be seen in Figure 3.4.
r
Ad hesice Backing
Figure 3.3: 1/8 inch thick, I % inch wide magnetic strip with adhesive backing
Figure 3.4: 1/16 inch rubber foam gasket with adhesive backing
3.5 Plugs and Adapters
The design constraints required that the data from the experiment could be recorded without comprising the integrity of the enclosure. Thus, a variety of adapters were incorporated
into the wall of the enclosure. A standard BNC adapter was chosen as the main device that would be put into the wall. The adapter is shown in Figure 3.5. The adapter allows BNC cables to be connected on the inside, as well as the outside. Therefore a cable can be attached on the inside and run to the experiment, and another cable can be attached to the outside to acquire the measurements. The connectors have an impedance of 50 ohms.
Figure 3.5: Standard BNC Adapter
I
Adhesive Backing
---A second style of connector was also incorporated into the design to allow more flexibility with data recording mechanisms. The second style is a BNC to stackable double banana plug. This connector is shown in Figure 3.6. This plug allows BNC and banana plug connections to be used with the experiment. This adapter also has an impedance of 50 ohms.
Figure 3. 6: BNC to stackable banana plug
3.6 Thermocouple Sensor
A thermocouple was also incorporated into the design to accurately measure the temperature inside of the enclosure. The probe chosen is a calibration model J. This model allows a temperature range of 0 to 750 degrees Celsius to be measure. Since the probe is being used to measure the temperature inside of the enclosure this range adequately covers that specification. The probe is made of stainless steel to guarantee that no rusting will occur. The smallest probe was chosen and has a length of 6 inches and a diameter of 1/16 inch. Finally an
quick disconnect model was chosen so that it could be easily remove from the enclosure when not in use.
CHAPTER 4
4 Fabrication and Assembly of a Prototype
This section details the process necessary to manufacture and assemble the components of the enclosure.
4.1 Fabrication Method Selection
Since the acrylic is easily machined with a variety of tools, the waterjet was chosen as the main device to cut the acrylic sheets. For the steel beams they are most easily machined on the
automatic horizontal bandsaw thus that process was chosen. In order to drill the holes for the BNC adapters the drill press was chosen over the waterjet. If the waterjet is used to machine the hole there is a high likelihood that the material could crack. This is because there would be a high pressure concentrated on a small point. Also, the tolerances on the waterjet wouldn't be as precise as they are on the drill press.
4.1.1 Waterjet Cutting
To prepare the part for the waterjet cutting the solidmodel was saved as a DXF file. That file was then opened in the OMAX program that the waterjet uses to machine the part and the
each sheet so that the dimensions are correct. Since the cut has a thickness if the edge isn't correct the parts could easily have the wrong dimensions. The acrylic sheets were then cut on the abrasive water jet. The waterjet model is Omax 2652 as shown in Figure 4. 1.
Figure 4.1: Omnax 2652 jet machining center used to cut acrylic sheets
This machine allows the sheets to be cut easily with clean edges and straight lines. As the acrylic sheet was 24 inches x 48 inches it was important to make sure that the parts that were going to be cut only occupied up to 45 inches of the sheet because the machine isn't able to cut past that point. A 5 quality cut was used to guarantee the best quality. Approximately 5 panels were cut from each sheet. To machine one sheet (5 panels) took approximately 7 minutes of cutting time, thus the water jet helped produce high quality parts in a short period of time with minimal effort.
4.1.2 Saw
The steel beams were cut on the automatic horizontal bandsaw shown in Figure 4.2. This machine allowed the large pieces to be cut with great ease, and provided a clean, straight edge where the cut was. The part was placed in the machine with the comer up. To get the right length cut the part was measured from the edge to the blade. Once the part was in place and clamped the blade was started. After the coolant covered the blade the rate was increased which automatically lowered the saw into the part and cut it. A slow rate is needed when cutting steel because if the rate it too fast the teeth of the blade can catch the material and damage the machine. This tool helped make the manufacturing of the supports very easy. The saw is shown in Figure 4.2.
Figure 4.2: Automatic horizontal bandsaw with steel beam placed with edge up
4.1.3 Drilling
The next step to allow the plugs and adapters to be incorporated into the sheet was to drill holes for them to fit into. The holes were drilled on a drill press. A 7/16 inch unibit was used to
because of its design, didn't catch the material at all, or cause any chipping, and left a very clean edge that the adapter easily fit into. The unibit is shown in Figure 4.3.
Figure 4.3: Unibit used to drill holes in acrylic for BNC connector
Two holes were also drilled using a #15 bit for the BNC, stackable plug.
4.2 Assembly
The assembly is comprised of two main processes; attaching the magnets and rubber strips to the acrylic sheet, attaching a steel square to the supports and mounting the adapters to the connection sheet.
4.2.1 Attaching Magnets and Rubber Strips
With the machining complete the magnets and rubber strips were cut to size according to the plans. Magnets were attached to one face on all for sides so that each panel could be attached
in a variety of ways. This provides more flexibility to the use. In order to attach the magnet the paper on the adhesive backing is removed and the magnet is applied flush to the edge of the
panel. After the magnets are applied the rubber strip is attached to the edge to provide a cushion for the panel to rest on.
Figure 4.4: Acrylic sheet with attached magnet
4.2.2 Mounting the Plugs and Adapters
The plugs are placed into their specific places in the panel and glued into place. Weld-On 16 glue is used to guarantee a secure connection. Weld-On 16 is specifically designed to mount acrylics and other materials to each other. The Weld-On 16 product begins to harden in approximately 5 minutes and reaches full strength in 24 hours, thus it is very easy to use because it dries so quickly. The acrylic sheet with the attached adapters is shown in Figure 4.5.
4.2.3 Mounting Tops to Steel Supports
Squares of galvanized steel with added to the top of the steel supports so that there was a greater surface area of metal for the magnets on the top panel to attach to. Squares were cut for a steel bar that was 1 1/4 inches wide, and 1/8 inch thick. The 1 /4 inch squares
were then mounted to the top of the steel supports with an epoxy that bonds steel. The
epoxy begins to harden in 5 minutes which makes it easy to work with, and reaches final strength after 24 hours.
4.2.4 Final Assembly
After all of the parts are manufactured and the extra components are attached the enclosure is ready for assembly and testing. Four steel supports of the same size are placed on
place. On the panel with the adapters the wires and devices are connected and the panel is snapped into place. The final assembly is complete and the experiment is now protected from UV light, sound vibrations, and outside electrical factors.
CHAPTER 5
5 Performance Characterization
After the enclosure was fully assembled, its ability to fulfill the design requirements was tested.
5.1 Modularity
One of the main design components was that the mechanism be adaptable and easy to use. With the simple magnet design and attachment mechanism the enclosure fully fulfills this constraint. The parts snap on and off, and the wires can be easily attached and detached because of the BNC adapter design. The enclosure is obviously adaptable as it can be assembled in a variety of dimensions. The box can be assembled with 7 different dimensions. The acrylic sheets can be stored flat, and the steel supports don't require much storage space as well, thus it is applicable in a lab with minimal space. Also, because of the ease of manufacturing and assembly it is very simple to produce extra components which would increase the sizes that the enclosure can be assembled into.
5.2 Sound Resistance
A test was run to determine the effectiveness of the enclosure to reduce the influence of sound vibrations on the experiments. The enclosure was placed around an experiment that is currently being tested on the nanometer level. To test how well the experiment is protected data was taken for 30 seconds with a person clapping and making noise outside the enclosure. The same process was repeated without the enclosure. The data was then compared to see the results. In order to get high quality results data points were taken every 0.001 seconds. There are six different sensors reading the position of the device that the experiment is being run on. The axes that were most affected are shown in Figures 5.1, 5.2 and 5.3.
Noise without Box 4
7 . 1' .5 20 25 30
-. 5 10.· . .S - 2 . 25- 50 3
. . . . ... ..
~~~~~~~~:·
, . - ..11m95e.. .
Noise with Box 4
-11.7 . - 6 10 15 20 25 30 35 -1172, -11 74 -1176 -11.78 o ' -11.8 -11.82 -11 84 -11.86 -1188 _ - , ' - . 19 -- ---. TIme (.) -11 7 S Io
Figure 5.1: Graphs showing the position of the experiment with and without the enclosure as noise was occurring around the system
i i i i I . .1, I I 1. -~ . :, I I I I ~~ I I I ~ I I . . . I I
Noise with Box 5 S
i
,5 ,,, ...
.
. .20
,
.3
0
t ' S ~' : ic ' ic ' ' -2.'- . - : -34.9 -3 -35.0 -35. -;' " ."...:,, ... ?..: I.:::;, i .~.;;::/.:
';'I..:.,":, ''.,;':..¢~ ';~~ ;-..'. .. :..-
-5·
..; ' ..'...
.';,:
.... .$
.. -s
-'
-.: ...
::..,..~.~
.,...,...,..,...?.~
:. .
-35.15 Time TInn. (Figure 5.2: Graphs showing the position of the experiment with and without the enclosure as noise was occurring around the system
Nose wth Box 6
Noke wihout Box 6
19.75 19.7 19.65 19.6 19.55 19.5 N [ 0 5 10 15 20 25 30 35 Ime .(
Figure 5.3: Graphs showing the position of the experiment with and without the enclosure as noise
was occurring around the system
Tim. ( _ 19.8 19.75 19.7 1 19.65 19.6 19.55 - -.
Nol" without Box 5
5
5
As can be seen from the graphs the enclosure has a positive effect on the results of the system. In Figure 5.1 which shows the position of the experiment in the Z axis, it can be seen that the noise affects the experiment when the enclosure isn't present. The values are rising and cover a much wider range than when the box is in place. Without the box the values range from approximately 11.77 to 11.87 while with the enclosure they range from 11.76 to 11.82. The enclosure provides us with a 40% improvement on the data range. The large difference for the values without the enclosure has a large effect on the results in the nanometer scale, as this experiment shows. With just some clapping and talking a lot of error was added to the data. Figures 5.2 and 5.3 shows similar problems where there are large jumps in the data when the noise affected the experiment. This doesn't occur when the enclosure is protecting the apparatus. Overall, the enclosures effectiveness is apparent; it provides the extra protecting that is important to experiments of this type.
CHAPTER 6
6 Conclusions
This design is very important to the experiments where experiments are being run on the nanometer level. The enclosure allows an experiment to be protected from a variety of outside factors, such as ultraviolet light and sound, while having an interface that makes it function in a laboratory setting. The system is designed with all the important components such as being easily adaptable and broken down for storage with the necessary connections for data acquisition. The enclosure has an impact especially in the education setting where there isn't much space in the laboratory and materials and space are often shared. This design can be applied to a variety of projects because of its ability to change sizes, but also because it doesn't cover the whole table like the current experiment covers on the market. It can be individually applied to each specific experiment as needed.
enclosure system and test it on their experiments they praised its ease of use and its functionality. Also, the experiment performed to test the effectiveness of the mechanism to protect the experiments from outside vibrations proved that the enclosure fulfills the design constraint. The design takes into account the user and their needs and applies them all into the overall enclosure design from the materials, to the machining process, to the assembly and application.
Through the design this enclosure system can easily be adapted to incorporate new design parameters as they arise. It also is easily manufactured; therefore a large number of the parts can be constructed to allow an even larger range of dimensions for the box. The simple design and its ability to protect the experiments from numerous outside influences with just acrylic, steel and magnets, make this a powerful tool in precision experimentation.
References
[01] Slocum, Alexander. Precision machine design. Dearborn, MI: Society of Manufacturing Engineers, 1992.
[02] "Discussions with Professor Culpepper." March 2006
[03] (2002). "Physical properties of Acrylite GP." Cyro techknowlogy center. 2002. Cyro. 28 April 2006.
<http://www.cyro.com/Internet/SiteContent.nsf/WebMSDSs/58CFOA9D8BB0671 C8525 6B6F006690F4/$File/1 235E+GP+Physical+Properties.pdf?OpenElement>
[04] (2001). Cyro techknowlogy center. Cyro. 28 April 2006.
<<http://cyro.custhelp.com/cgibin/cyro.cfg/php/enduser/stdadp.php?p_faqid= 1 269&p_c reated= 1 082999824&p_sid=9eEtF_6i&p_accessibility=0&p_lva=&p_sp=cF9zcmNoPTE mcF9zb3 JOX2J5 PSZwX2dyaWRzb3 JOPSZwX3 Jvd 1 9jbnQ9NjQ 1 JnB fcHJvZHM9MCZ
wX2NhdHM9MCZwX3 B2PSZwX2N2PSZwX3N IYXJjaF9OeXBIPWFuc3dlcnMuc2Vh cmNoX25sJnBfcGFnZTOxJnBfc2VhcmNoX3RleHQ9bGlnaHQgdHJhbnNtaXNzaW9uI GN 1 cnZlIGFjcnlsaXRIIDQzNiOO&p_li=&p_topview= 1>>